There is no Windows DVD Maker for XP. The product is designed for Windows Vista and 7. Still, people wish there was Windows DVD Maker for XP. This article compares Windows DVD Maker and Windows Movie Maker and then offers a small tweak that produces videos as good as Windows DVD Maker.
What is Windows DVD Maker - Difference in Windows DVD Maker and Windows Movie Maker
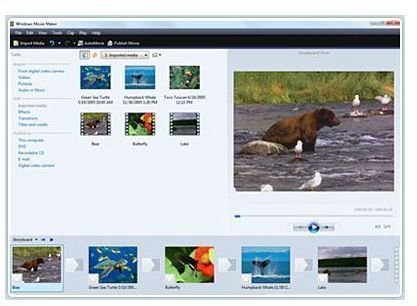
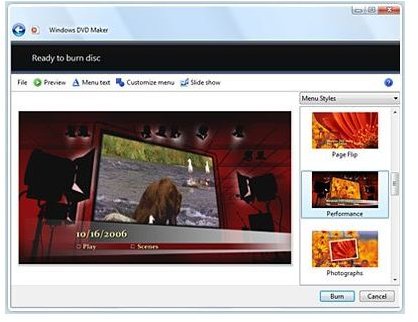
You may think of Windows DVD Maker (Fig 1) as an enhanced version of Windows Movie Maker (Fig 2): with more features that are easy to understand and use. Designed specially for Vista and Windows 7, Windows DVD Maker has a range of transition effects. Transition effects define how a media clip moves to the adjacent media clip. Windows DVD Maker is used to create a video using a selection of photographs or small videos from your HD camera with some audio for use with DVD players.
The product offers features such as adding special effects to the media clips as well as transitions. You can use the transition effects to dissolve a photograph to produce the next in sequence. Alternatively, you can use a transition effect that gives an impression that the next photograph emerges from the center of the current image to cover the entire screen.
If you have worked on the Windows Movie Maker in Windows XP, you will find that there is only slight difference between Windows DVD Maker and Windows Movie Maker. The Windows Movie Maker too can capture images and video directly using your camera. It too has several transition and clip (video) effects. The only thing is that Windows DVD Maker can write directly to a DVD and contains few more video effects as well as transitions. It has its own problems too. Sometimes it won’t burn the DVD properly. In such cases, follow the steps mentioned in the second section – to save and burn your DVD.
The basic requirement for running Windows DVD maker and Windows Movie Maker are same except for the operating system. Windows DVD Maker will not install on Windows XP. If there is no Windows DVD Maker for XP, the XP Windows Movie Maker will help you create extraordinary quality videos. You just need a few extra clicks while building the final output.
How to Create HD quality DVDs using Windows Media Player
Before you think about creating a video, check out the quality of original images/videos. The image quality of clips should be above 300 dpi or better - for both Windows Movie Maker and Windows DVD Maker. If the original image or video itself is blurred, you cannot expect good quality videos. It is also recommended that you pay attention to the exposure and other natural effects as you click or shoot a video.
Once you import the clips into the Windows Media Player, you can always add special video effects to further enhance the image or videos. Select transitions as you wish. To apply same effects to multiple clips at a time, select the clips using the CTRL key and then apply effects using Clip → Video → Video Effects. After compiling the entire project and adding effects plus transitions, check out the output preview (ALT+ENTER).
Now comes the main part: creating a HD quality Video using Windows Movie Maker in XP. To achieve this, follow these steps:
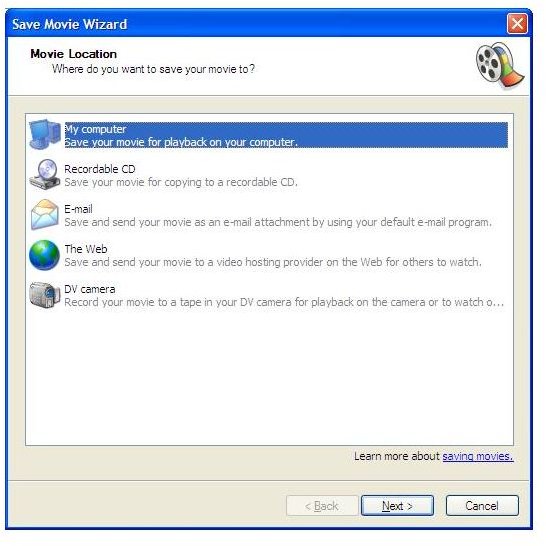
- Press CTRL +P or select Save Movie File from File menu. This will start a wizard that presents you with Movie Location window (Fig 3). Select My Computer and click Next.
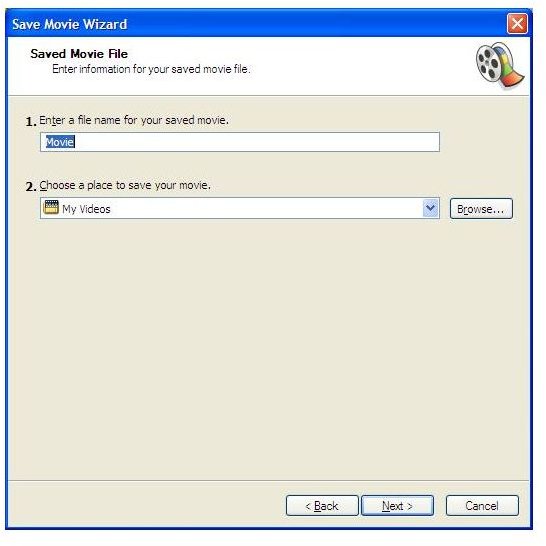
- You will get a window that asks for your movie file name and location (Fig 4). Type in movie name, select location, and click Next.
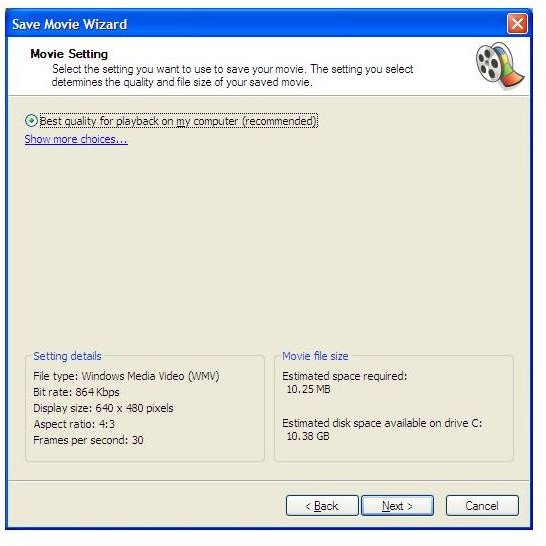
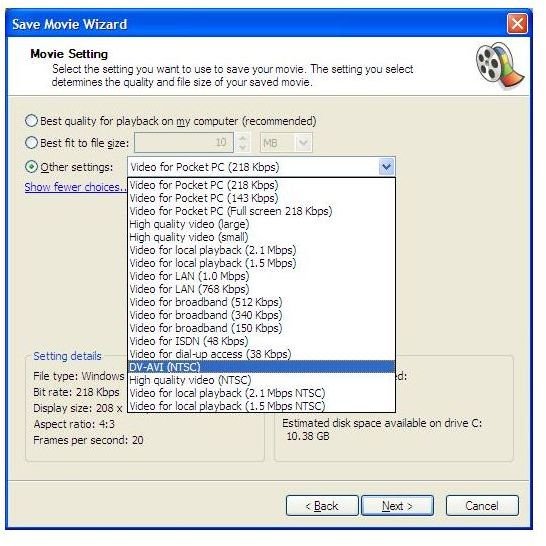
- You will get a Movie Setting window. Ignore the default selection as in Fig 5. Click on Show more Choices.
- The wizard will present you with many options. Click on Other Settings and select DV-AVI (NTSC). Click Next to save a high quality video (at the location specified in step 2).
Once the movie is created, you can use a third party DVD burning software to burn a DVD that can playback on any DVD player. With this method, you will never miss Windows DVD Maker for XP.
NOTE: For video enthusiasts, I recommend re-encoding original videos using Windows Media Encoder for best results (such as creating a 16:9 DV): creating best quality DVD using Windows Media Maker. For still images, a touch-up using Adobe Photoshop (before compiling) will add even more life to the final output - you’ll never need Windows DVD Maker for XP!
Image References