How to Build a Windows FTP Server
Overview
The File Transfer Protocol (FTP) has been around since the early 1970s and the “modern” version of FTP used today has been standard since 1985. It’s especially useful for use on an intranet to transfer files via script. Due to the lack of security associated with FTP, it is highly recommended that you don’t use FTP on an external facing site. Passwords are transferred in plain text and can easily be intercepted. Note that this also may be an issue on an intranet - depending on what you anticipate transferring.
For the purpose of this article, we will make the assumption we already have a basic Windows 2003 Server installation. This server will host the FTP service. We will be connecting using the standard Windows XP FTP client.
Installing the FTP Service
FTP comes with Windows 2003 Server, but is not installed by default.
-
Log into the Windows 2003 Server.
-
Go to Start, Control Panel, Add or Remove Programs, Add\Remove Windows Components.
-
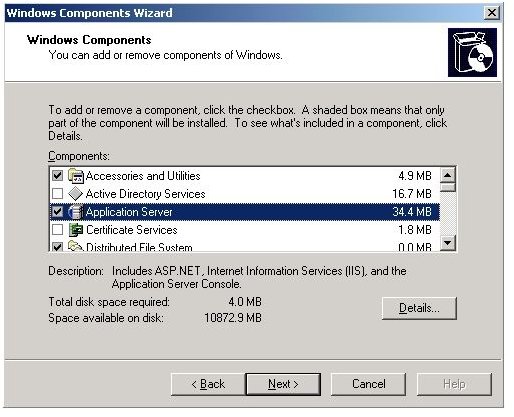
After a moment, the Windows Components Wizard will start. Double click on “Application Server” (Figure 1).
-
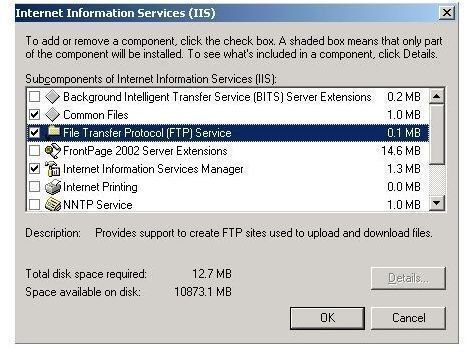
Double click on “Internet Information Services (IIS)”.
-
Check the box next to “File Transfer Protocol (FTP) Service”. Note that “Common Files” and “Internet Information Services Manager” will automatically check themselves. These are required components (Figure 2).
-
Click OK twice (you should be back at the Windows Components Wizard). Click Next.
-
Windows will begin configuring the FTP service. Note that you may be prompted to insert your Windows 2003 Server CD. Insert the CD or click OK to Browse for a location on your network. After a few moments, the install should be finished. Click Finish.
At this point, FTP is installed, but it’s not configured.
Configuring the FTP Service
-
Go to Start, Administrative Tools, Internet Information Services (IIS) Manager.
-
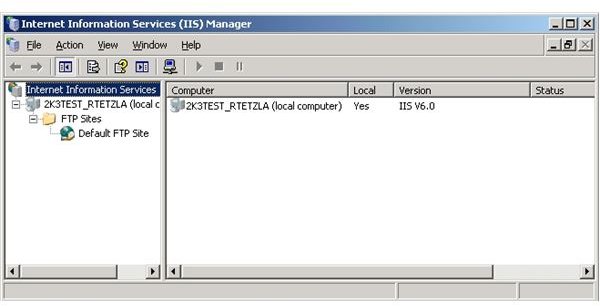
Expand the server name, FTP Sites and you’ll see your default FTP site (Figure 3). Right click on the Default FTP site and select Properties.
-
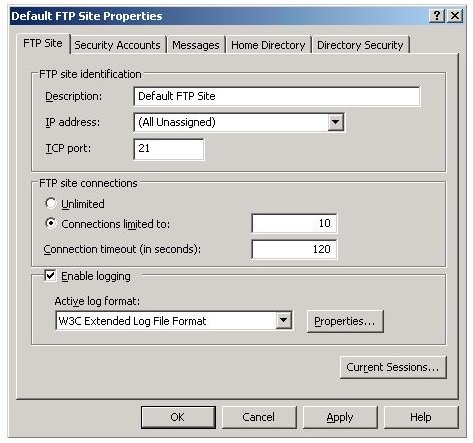
On the main properties page, you may consider limiting the number of connections based on the number of people you feel would reasonably connect at any given time. You should also make sure logging is enabled so you will be able to determine who connects to your FTP server. You may consider moving the default logging location to a separate partition from the OS. Just click the Properties button and select a new location (Figure 4).
-
On the Security Accounts tab, determine if you want to force people to log in (recommended) or to allow anonymous access. Uncheck the checkbox to disable anonymous access.
-
You can create a custom “banner” under the messages tab if so desired.
-
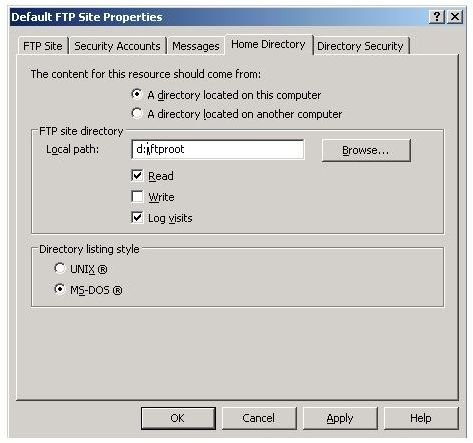
The Home Directory tab is used to specify the location where your FTP files will be kept. I would also suggest setting this to a separate partition from your OS partition (Figure 5).
-
The Directory Security tab can be used to restrict which computers (based on IP address or subnet) are allowed or denied from connecting. Click OK when you’ve finished.
-
Open up a command prompt on your Windows XP client and type ‘ftp xxx.xxx.xxx.xxx’ where the string of ‘x’s are the IP address. (You can also perform a local test as shown in Figure 6). You should be prompted to enter a username and password and then you should be connected after supplying your credentials.
Setting up the FTP service in Windows 2003 is relatively painless and can give you a good way to programmatically place and retrieve files. Keep in mind the security risks associated with using FTP over something more secure like SFTP or FTPS.
Images