Many tutorials on the web show how to create a bootable USB flash drive using the trial version of UltraISO. That’s certainly possible, but by using a Windows 7 DVD and the built-in partition management program “diskpart,” the procedure is pretty simple, and it’s free.
Need to create a bootable USB flash drive to install Windows 7 on other PCs or on your ultralight laptop or netbook that came without an optical drive?
I found many tutorials on the net that showed a method using the well-regarded commercial product “UltraISO,” but I wondered if the built-in commands and programs already in Windows 7 and/or open-source, free software would allow me to do the same.
The answer is “Yes!”
The program on the Windows 7 or Vista PC is called “diskpart.exe.” With it and a Windows 7 DVD or ISO image file, and using the free burning program ImgBurn if necessary, one can create a bootable flash drive (4 GB or larger) without using any other tools. Here we show you how.
Prepare the Image File
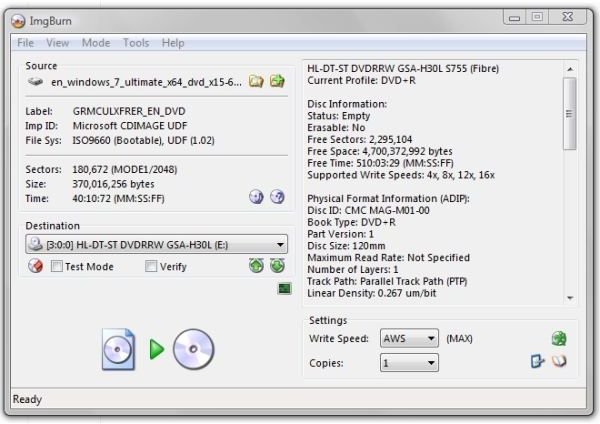
If you dowlnoaded the release candidate version (RC) or the release to manufacturing version (RTM) and have the .ISO image file on your PC, you will need to burn it to a DVD for this process to work as described. ImgBurn is a good choice for this . With a blank DVD in the drive, right-click the ISO file and select “Open with… ImgBurn.” Then click the green icon at the bottom to start creating the Windows 7 disk.
When finished, you’ll be able to go to “Computer” and “Open” a window on the contents of the DVD.

Of course, if you have the Windows 7 production disk, that’s great.
Backup the Flash Drive!
This procedure will definitely erase everything from the flash drive, so if you have anything at all on it you want to save, click on Computer, click the flash drive icon, and drag the entire thing out to your desktop.
Once you have the drive backed up, reinsert it into the PC, and you’ll be ready to continue.
Prepare the Flash Drive
diskpart.exe is a command-line interpreter used for managing partitions, disks, or volumes in Windows XP and newer versions. It’s an adjunct to the graphical (GUI) disk management provided by the Windows “Disk Management” applet, which is designed to be pretty much goof-proof.
DiskPart is not goof-proof, so please read through all the following steps and make sure you understand the sequence before starting.
Some users may be unfamiliar with using a multi-line interactive application in a DOS window. This simply means that the program acts on the commands you enter and then presents a menu for further actions.
Also, please note that the procedure has to be started and completed on the same computer. (If the computer has a poorly performing DVD drive that gets read errors, the procedure may well fail. In this case, we suggest that you try on another, maybe newer, machine.)
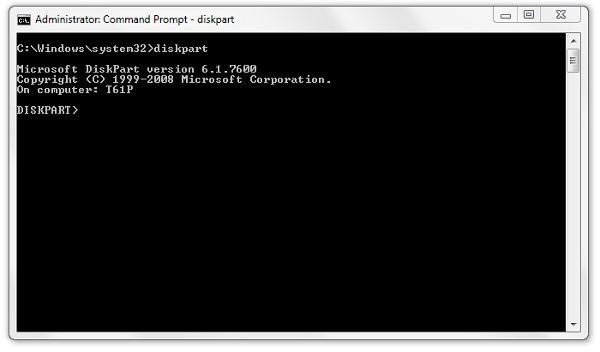
You’ll need administrative permissions to do this, so start by selecting All Programs → Accessories and right-click Command Prompt and select “Run as administrator.”
Then type in “diskpart.” The program will respond by creating a “DISKPART>” prompt.
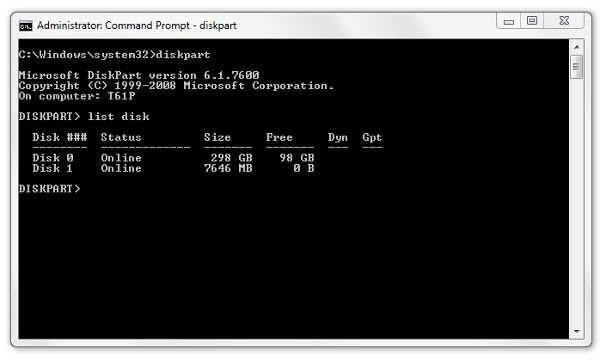
Enter
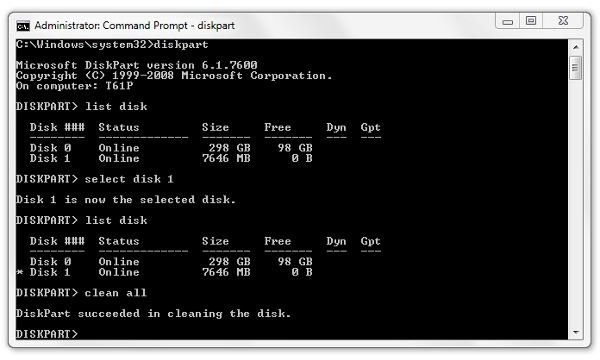
list disk
at the prompt. Note that “disk” is not plural in the command. In the image below, the flash drive is showing up as 7646 MB, and yes, that’s the flash drive. The first drive (C:) is listed as Disk 0, so on this PC, the flash drive is Disk 1.
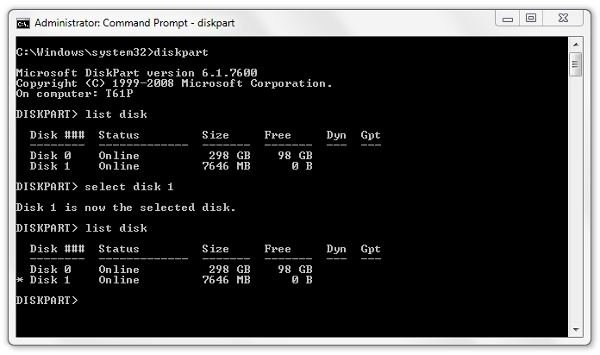
Most of the commands in DiskPart apply only to the drive or partition that has focus or is selected. This is denoted by an asterisk beside the partition name. To give the flash drive, which is Disk 1 in this example, the focus enter
select disk 1
The next step is to remove any volume or partitioning information from the flash drive. Since Disk 1 (or whichever disk number is the flash drive on your PC) still has focus, the command
clean all
applies to the flash drive only. This step “zeroes out” all the data on the drive, so it takes a while to run. (The larger the flash drive, the longer, of course.) Note also that DiskPart gives no feedback about progress. When the light on the flash drive stops flashing, the prompt will return.
Next: Continuing preparing the flash drive, copying the install files, and using the bootable flash drive to install Windows
Now we’re ready to create the primary partition on the flash drive and mark it “active.” There are three commands involved. After the partition is created, it needs to be selected. Then the partition needs to be formatted to receive the disk image. The commands are:
create partition primary
select partition 1
active
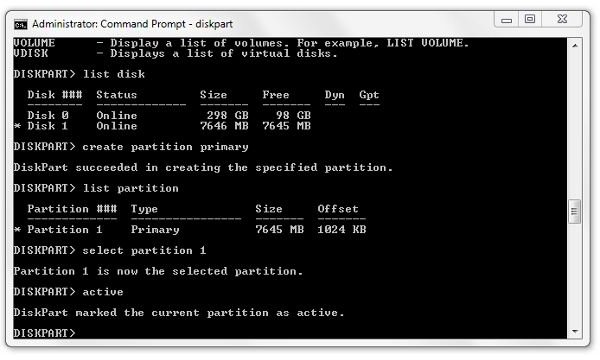
The “active” command told DiskPart to make the partition capable of containing the operating system’s start-up files, i.e. become bootable.
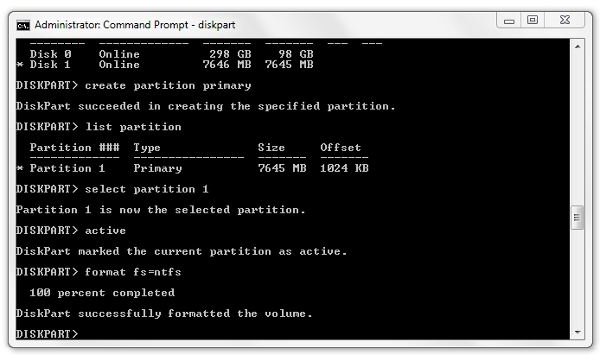
To format the partition to receive files, enter
format fs=ntfs
(This command will provide some feedback; it will show you the percentage completed.)
There’s one task remaining in DiskPart, and that’s to forestall an error later where Windows may fail to give a drive letter assignment to the flash drive. Enter
assign
Entering the command by itself causes DiskPart to assign the next available drive letter to the flash drive.
And that’s all we need the DiskPart program for. Enter
exit
to leave DiskPart and enter
exit
to close the command prompt window.
Copy the Files to the Flash Drive
We’re almost there. The only remaining task is to copy the contents of the Windows 7 DVD to the flash drive.
Open a window on the contents of the DVD and select Edit → Select All (or press Ctrl+A). Then select Edit → Copy.
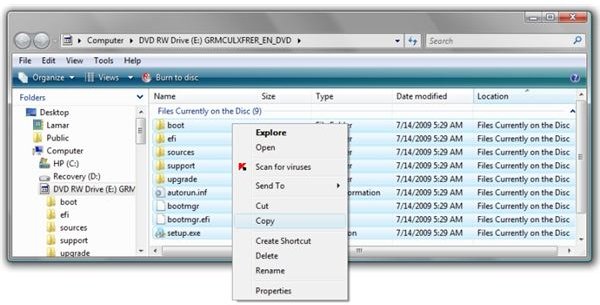
Then open a window on the contents of the flash drive (which should be empty), click inside, and select Edit → Paste. This may also take a long time, so be prepared to give it a while to complete.
When it’s done copying, click the “Safely Remove Hardware” icon in the notification area (system tray) and select the flash drive. Then remove the flash drive.
You’re finished. You have created a bootable flash drive that will install Windows 7.
Use the Bootable Flash Drive to Install Windows 7
Not all PCs are set up to boot from a USB drive, and on some that are the capability is not enabled. Try to boot from the flash drive first, and it should say “Installing files” and then “Starting Windows.” If that doesn’t happen, remove the flash drive and press the Power switch to shut the PC off.
The start-up screen should tell you what to press to enter the BIOS setup. Look for a function named “Boot” or “Boot Order,” select it with the up and down arrow keys, and press Enter to change the setting. You want to set “USB 2.0 Drive” or similar to boot first, then the CD/DVD drive, and then the hard drive.
If this setting is absent, the PC is not set up to boot from a USB flash drive. It’s possible that a BIOS update may provide the ability, so you’ll need to check with the PC manufacturer to find out.
If you have an ultralight or netbook without an optical drive, it’s very likely that the device was designed to be able to boot from a flash drive and you’ll have no issues.
Conclusion
So it is entirely possible to create a bootable flash drive in Vista or Windows 7 to install Windows 7 on another PC, and it can be done without purchasing any other application.
How did it work for you? If you had problems (or success) with the procedure, please let us know in comments.


