How to Set Up A Windows XP Domain Using Windows Server
Overview
If you have more than a few people and computers using your network and you currently use a Workgroup infrastructure, you’re likely to benefit from upgrading to a domain. Windows Domains have the benefit of centralizing your user authentication and allowing you to specify policies that control the way desktops operate along with security settings.
Before you start setting up your Domain, there are a few things you need in place:
- Windows 2000 or newer server (2003 or 2008 highly recommended)
- Windows 2000 or newer clients (Windows XP or Windows 7 recommended)
- Network infrastructure
I’m making the assumption you’re comfortable with configuring computers and setting up networks and you’ve already got a computer network set up with computers and server running in a workgroup.
Before you begin, you’ll want to make sure you’ve got good backups of the server you are promoting. Ideally the new domain controller would be a new piece of hardware, but you can upgrade an existing Windows 2000+ server if you choose.
Setting up the Domain - Part 1
The general steps are to run the Domain Controller Promotion tool, install DNS (if not already present) and to take a backup of the environment. The first few steps should only take a few minutes assuming all goes well.
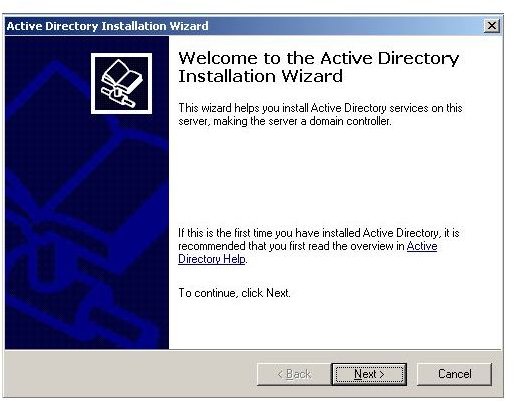
- On the Windows Server run the promotion tool by going to Start, Run and enter “dcpromo” in the Run window. The Active Directory Installation Wizard will start (Figure 1). Click Next.
- Since this is the first domain controller in the domain, you’ll want to select the option to set up the domain controller for a new domain. Click next.
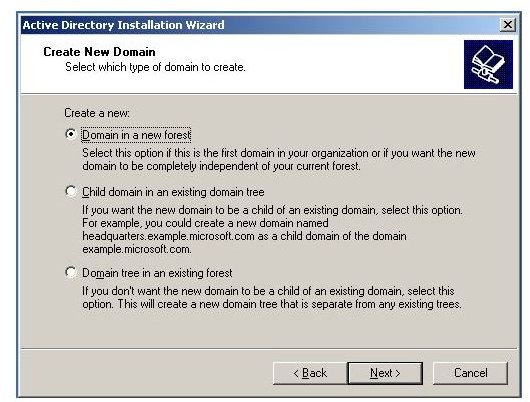
- Select the option to create a new forest. This just means you don’t have an existing domain that you want to “connect” to. This domain will act independently of anything else out there (Figure 2).
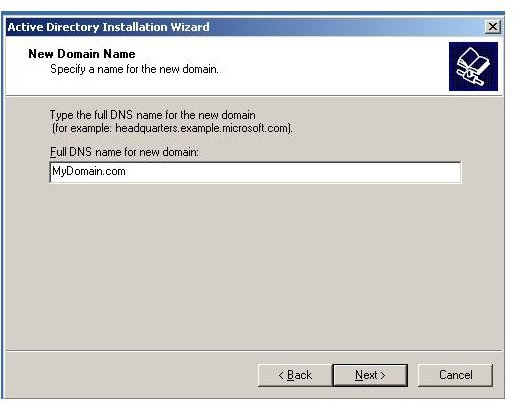
- You will be asked to name your domain – enter in the name of your domain and hit Next (Figure 3).
- The next screen asks for the NetBIOS name - this is just your domain name without any suffix (ie .com, .org, etc.). Click Next.
- You will be asked where you want to store the Active Directory Database - you can keep the defaults and click Next.
- Next you are asked where to store the “Sysvol” - this is just a directory on your server where clients and other domain controllers will look for policy and other Directory related information. Keep the default and click Next.
Images
Setting up the Domain - Part 2
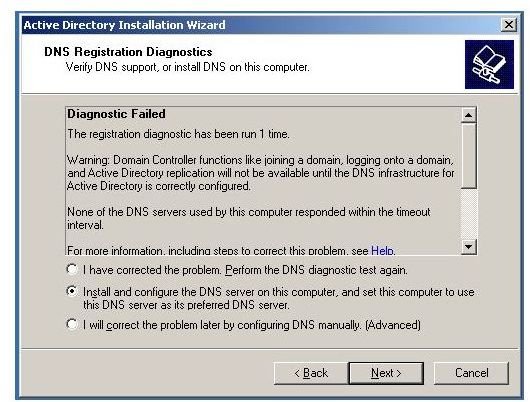
- The installer will now determine if you have DNS installed. If you don’t, go ahead and have the Wizard install it for you. If you are an advanced user, you can install DNS on your own. Please be aware that in my experience, the majority of Domain issues are related to DNS, so unless you really know what you’re doing, be sure to have the Wizard install it (Figure 4).
- Next you need to specify how permissions will be handled. Since this is your first domain, go ahead and select the default option. This option exists to give you backwards compatibility with older operating systems.
- Enter a restore mode password. If you ever need to restore your domain, you will need this password. Be sure to write it down in a safe place! Click Next.
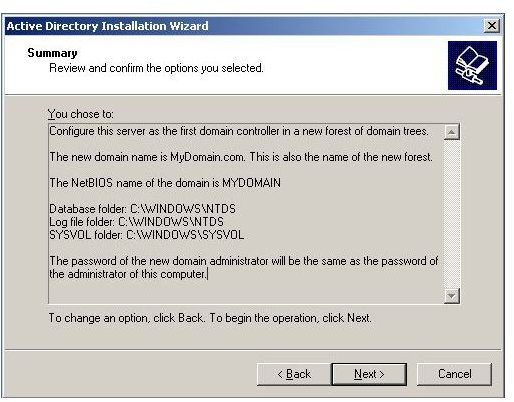
- The last screen shows you a summary of your choices (Figure 5). Click Next to install the directory.
You will be notified once the directory is set up and will be requested to reboot.
Next Steps
The first thing you should do after the domain is set up is to create a backup of the domain controller. If you can, you should create a secondary domain controller to act as a backup to the primary if it should become unavailable. Setting up a backup DC is similar to creating the first except you’ll be adding to an existing domain instead of creating a new one.
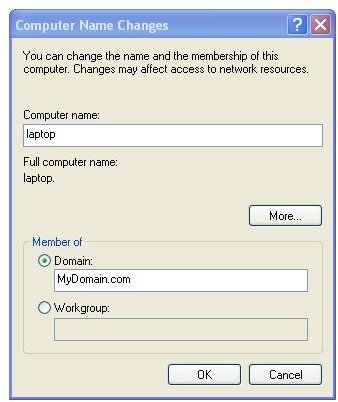
Adding clients to the domain – to add a client machine to the domain, you go to Start and right click on My Computer and then select Properties. Click on the Computer Name tab. In the domain field, enter the name of your domain (Figure 1). Click OK and you will be prompted to enter administrative credentials to join the domain. After the client contacts the domain controller, you will be prompted to reboot.
User Accounts can be managed using Active Directory Users and Computers and can be found under Start, Control Panel, Administrative Tools. User accounts and groups can be created here. Passwords can be easily reset by right-clicking on a user account and selecting Properties.
Group Policy can be managed by going under Start, Control Panel, Administrative Tool, Group Policy – be sure to read up on the details of setting up a group policy since it is possible to set a policy that locks you out of logging into your computers.
There is so much you could cover regarding domains. If you really are going to go through with setting up your own domain, you should read up on the topic.
Images