On some rare occasions, you will install a new USB drive such as a portable hard disk or a “thumb drive” and you won’t be able to access it via Windows Explorer, so you can’t use it. Most of the time, Windows just didn’t assign a drive letter to it. Here is how to fix it.
It installed, so where is it?
It is not exactly the most common issue I have encountered, but every once in a while it happens. You bring home a new USB drive, either a portable hard drive, a USB memory stick, or maybe an internal hard drive within an external enclosure. You plug it in and Windows notifies you that it detected a new device and it is installing the driver for it. A second or two passes, Windows notifies that it is done installing the driver and that your new device is ready. You click “Computer” (or “My Computer” if you’re using XP or older) and, where is it?
You see your hard drive, the floppy drive, your optical drive, but the USB drive is missing. You check that the light on the drive is on, indicating that it’s receiving power and it certainly is. You click on the “Safely Remove External Drive” icon in the taskbar and there is no entry for your drive. You unplug it and plug it back in, wait a moment, and it’s still not there. Explorer can’t access it. You’re scratching your head and probably thinking Bill Gates had something to do with it. Ahh, just one of those wonderful Windows quirks that seem to happen randomly, though admittedly I’ve not seen it happen with Vista yet, but I have seen it quite a few times with XP.
Windows just forgot to assign a drive letter to it
Most of the time, the reason for Windows Explorer not displaying the drive is that Windows simply did not assign a drive letter to it. It isn’t the most common thing to happen, but it does, and it can leave even the savviest of computer users perplexed if they’ve never encountered this problem before. But don’t worry, it’s quite easy to fix. A quick trip to the Computer Management Console and its Disk Management Module will do the trick. If that sounded like pig Latin to you, don’t worry. Here is how to get there:
Option 1: Via Control Panel
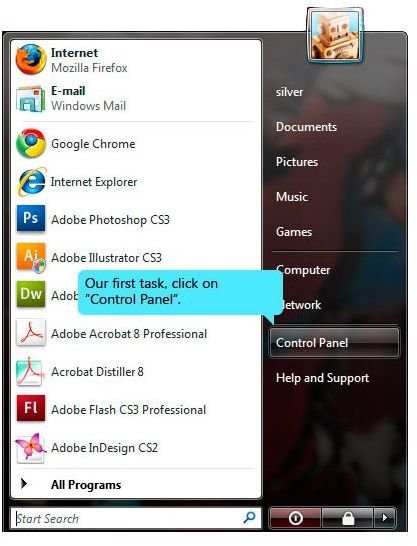
1. Click on the Windows Start Button, look for the Control Panel Option and click on it. (Click image to enlarge.)
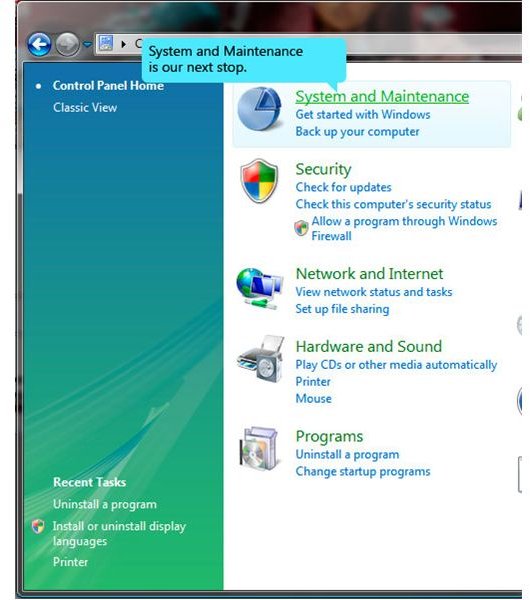
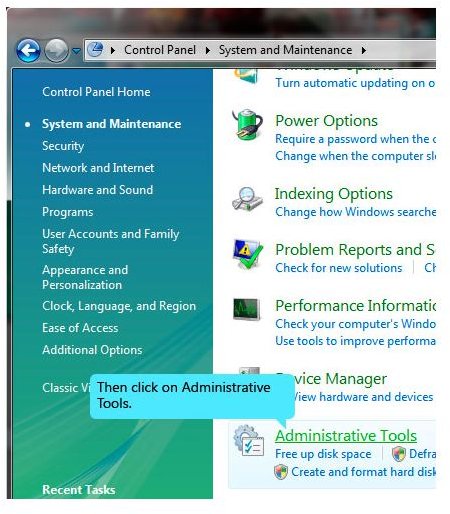
2. Depending on how you have the Control Panel set up (it could be set to Category View or Classic View), you’re looking for either System and Maintenance under Category View, or Administrative Tools in Classic View. The Classic View Administrative Tools will take you to the Explorer Window that we want. If you have it set to Category View, you get one extra step, which is to choose Administrative Tools.
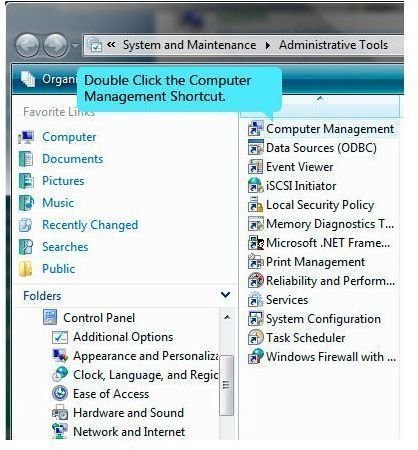
3. Now open up the Computer Management Shortcut. If you’re using Vista and UAC is on (which is what I suggest), confirm the operation when the system prompts for authorization.
Option 2: Run Computer Management Directly
Of course, if you like to get directly to the proper console with a minimum of fuzz and through the proper command, you can just hold down the Windows key and press the R key on your keyboard. Win Key + R. This will open up the “Run” dialog box. Enter the following command:
compmgmt.msc
This will take you directly to the Computer Management Console.
*If you’re using Vista and UAC is on (which I suggest as the proper setting), confirm that yes, you authorize the computer to open up the Computer Management Console.
Fixing the issue
Almost there. Just follow these steps and your problem should be solved:
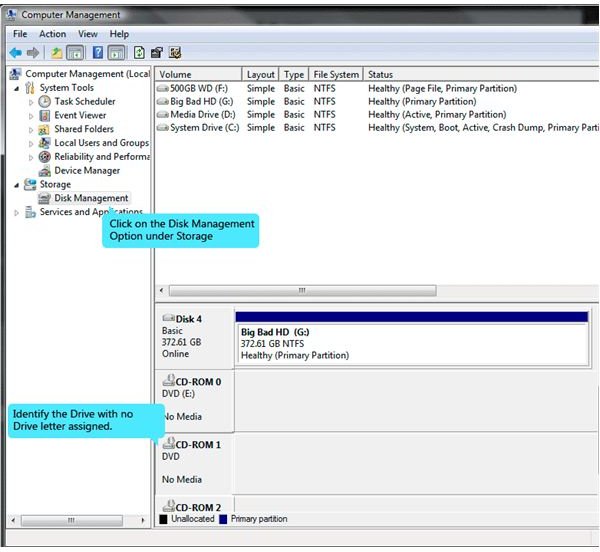
1. The Computer Management Console should have three panes. Look on the left pane for Storage. Click on it.
2. You should see Disk Management (Local) in the middle pane. Double click on that.
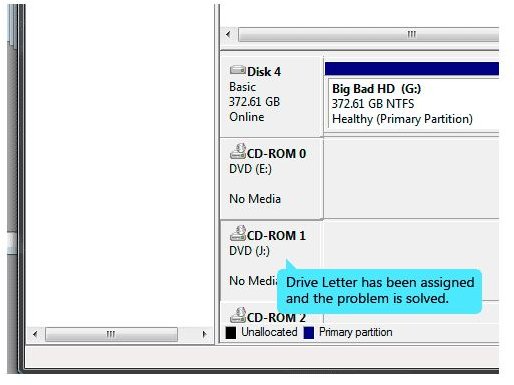
3. After a few moments, you should see that the middle pane has divided into two rows. The top row displays your currently detected drives and their drive letters. The bottom row has them identified with their drive letter (if it has one assigned), and with a number, starting with 0. You will also see information about their status and various tasks assigned to them (such as: Healthy, System, Boot, Page File, Primary Partition, etc.). Simply use the scrollbar to identify a drive that doesn’t have a letter assigned to it (such as CD ROM 1 in this example).
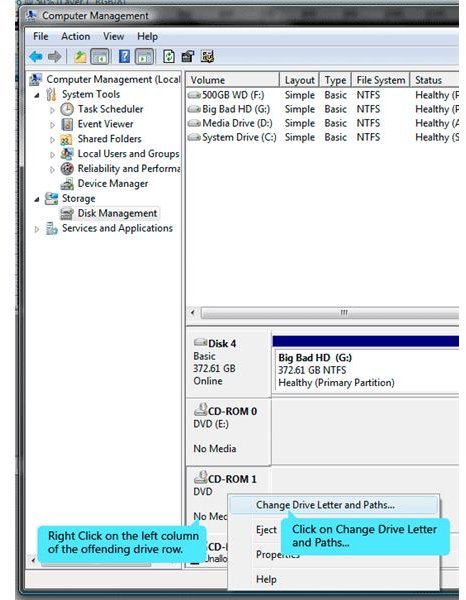
4. Once you’ve identified the culprit, right click on the column with the drive name and number (you don’t want the second, long column as that opens up different options) and, from the menu that pops up, choose Change Drive Letters and Paths.
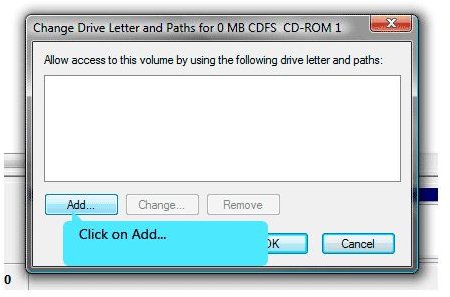
5. A new window opens up that says Allow access to this volume by using the following drive letter and paths: (so by not assigning one to it, Windows did not allow access to it). Just click on the button that says Add.
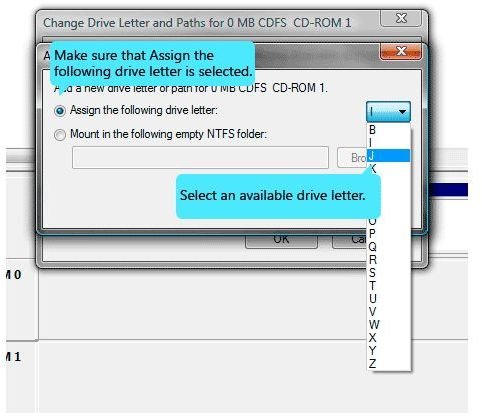
6. You want to assign a letter to it, so make sure the radio button is on Assign the following drive letter, then choose a letter from the ones available in the jump menu to the right of the radio button. Click Ok. You’re done! Your drive should now have a letter assigned to it and work from Windows Explorer without any problems. You may have noticed an option to Mount in the following empty NTFS folder. Now, if you know your way around Windows you can certainly use this option, but I don’t advise it in order to keep things simple.
That’s it!
I hope this article helps out anybody that has this problem. It’s not a particularly difficult fix, but it’s a problem that can catch us off guard sometimes.


