Microsoft Word offers a very useful option of creating ‘rich’ text documents. ‘Rich’ text enhances the plain text by changing its characteristics and by including additional elements. Let’s find out how to make text ‘rich’ in MS Word.
Styles
You have not seen anything good in Ms Word until you start using ‘Styles.’ One of the main uses of ‘Styles’ is to describe the role/ function of particular text.
There are many styles integrated in Word, such as ‘Body Text’, ‘Heading 1’, ‘Title’ and many more. These are very helpful in making your text look different and stand out.
Using Styles
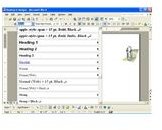
To apply a style to your text, highlight the text first then click on the Style drop-down menu. Choose the style you like
You can also apply rich text formatting on top of a ‘style.’ For example, you could also apply italics to the text, or make it bold.
If you want to create your own style, highlight the text. In the Style menu, give your style a name. Once this is done, you can make any changes to the text, such as font, color, size, indentation to make it your personalized text style.
Tips:
To eliminate all changes from a paragraph, press CTRL+Q, or to eliminate changes in all the text, press CTRL+SPACE.
To quickly look at characteristics of particular text, press Shift +F1, and then click on the text. To make a change, such as changing the font, click on Font.
Table Of Contents
A table of contents, as the name implies, is creating content as a table. Some examples are index at the start of a book, or an appendix often seen in the beginning or ending of a book. Rich text formatting enhances the look of your Table of Contents.
To create your own table of contents in Ms Word, follow these steps:
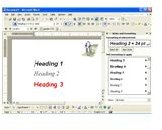
1 - In your document, click on a heading that you want to appear in the Table of Contents. Next, apply to it a heading style that you like, e.g. ‘Heading 1’. Similarly, apply ‘Heading 2’ to the sub-heading, and so on.
2- Choose Index and Tables from Reference in the Insert menu.
3- Click on the Table of Contents tab for options you might want use to apply any changes to your headings.
To change font options of your headings, such as size or color, go to the Table of Contents tab rather than using font change menus on the toolbar. Make sure you have chosen From Template in the Formats box. Click the Modify button, and then again in the new window, click Modify.
Ms Word displays three levels of heading in your Table of Contents, by default, but it is possible to show less or more headings. To do this, change the number in Show Levels on the Table of Contents tab.
Automatic Numbering
Text is typically written in sentences or paragraphs, but lists are often required as well. For example, if I were to write a list of fruits, I would type in the name of a fruit, press Enter, type another, and so on. Using numbering, a sequence number will be automatically added before each line as you hit Enter. This makes your list look more ordered and professional. Ms Word offers an automatic numbering option that adds numbers before each line automatically as you press Enter. To activate this feature:
1. Go to the Tools menu and select the AutoCorrect option.
2. Click on the AutoFormat as You Type tab.
3. Check the Automatic Numbered Lists option, and then click OK.
Borders And Shading
You can use rich text formatting to add a simple border to a paragraph in your Microsoft Word document to give it a special look. To do this, follow these simple steps:
1. Highlight the text, and then select Borders and Shading options from the Format menu.
2. Choose the border setting from the Borders tab.
3. Select Text in the Apply to box.
4. To change the width, color or style of the border, you can do it from the Borders tab.
Borders can have shades, too. This is great for making borders look fancy. To do this, choose a shade color from the Shading tab in the Borders and Shading window, and then click OK.
Similarly, it is also possible to create page borders. This can be done from the Page Borders tab in the Boards and Shading window.
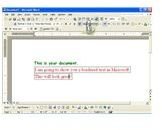
Here is an example of one of the border styles applied to the text:
Word Art
While it is not rich text, MS Word comes with another very special tool that allows you to create text as if it were graphics. This is useful not only for converting text into graphics, but also for making text that is wavy, 3D, circular, gradient colored, twisted and much more.
To add ‘Word Art’ to your document, open the Drawing Toolbar (if not already opened) from the View menu. Click the WordArt icon on the toolbar, and a window will open allowing you to choose a ‘Word Art’ style. When you choose a style, another window will open where you can type your text.
You can do many things to the ‘Word Art’ text. For example, to change the shape of the text, click on the text. A toolbar will appear. Click the Abc button
and choose the shape for your text. You can also indent, format and set the position of the text from the Drawing toolbar.
Word Graphics
While graphics are not rich text, graphics along with text can make your work appear richer. To add a picture, go to the Insert menu and choose From File in Picture. There you can browse for any picture to insert in your document.
A picture in your Word document is not just a picture with which you cannot do anything. There are many features in Word to help graphics merge beautifully with your text. Sometimes you may want a graphic with text, but it just does not fit properly or it overlaps. To properly place it, do the following:
1- Right click on the graphic and choose Format Picture.
2- On the Layout tab, choose an option to place the graphic wherever you want it, such as Behind Text or In line with Text.
You might have very dark colored graphics that may hide some of your text. To fix this, click on the graphic and a toolbar will appear. Choose Set Transparent Color.
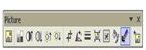
Place the cursor on the picture where you want it transparent, then left click. The background color will vanish.
You can make text look prominent and separate them from graphics by adding a gap between them. To do this, go to the Layout tab in the Format Picture window, and then click the Advanced button. There, you can set the distance of graphics from the text. Note that Behind the Text and Inline with Text options do not allow you to set graphics position.


