How to Add a Desktop Sidebar in Windows XP
Desktop Sidebar
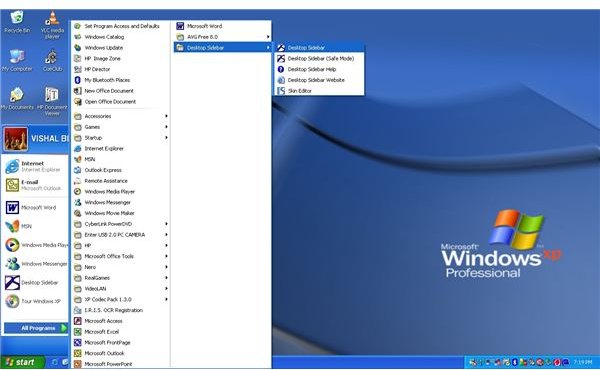
You can have it all and more at your fingertips with a Desktop Sidebar. It is available for all versions of Windows (Windows 2000, XP, Server 2003, and Vista), offers great functionality, and is a free application available for download at www.desktopsidebar.com. After the installation process completes, start the Desktop Sidebar program from Start button → Desktop Sidebar → Desktop Sidebar program.
To change the General settings, appearance, and options like internet settings, right-click on the Sidebar title and open the Options window from the context menu.
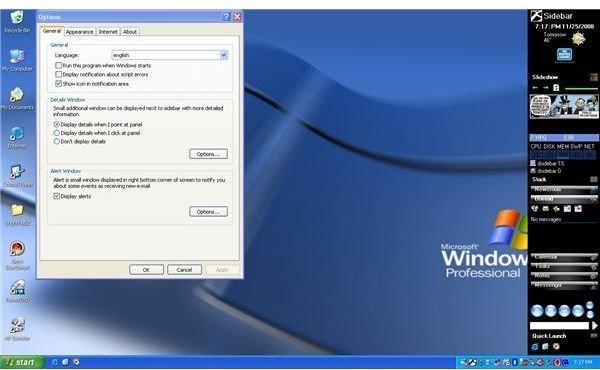
In the General tab, enable the Display details when I click on panel option under Details Window panel so that an explanation pop-up does not appear every time you place your mouse pointer over the Sidebar window. Tick on the Run this program when Windows starts option to run the application at system startup. Now switch to the Appearance tab and enable the option Auto-hide Sidebar if you want the sidebar to run only when you place your mouse pointer on it.
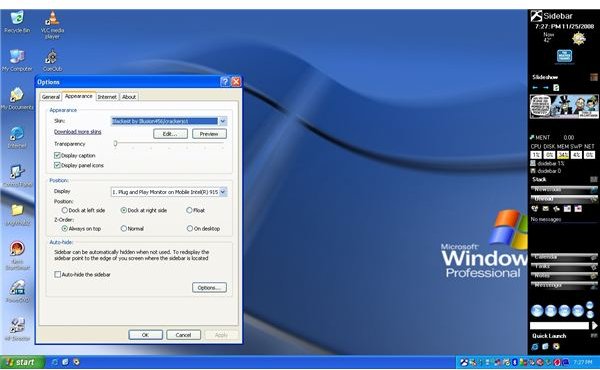
Save your settings and exit the Options window by clicking Apply and OK. The sidebar is now added to your Windows XP desktop, and you can utilize your desktop to the fullest capacity. The various gadgets are grouped into panels, and they can be configured at any time via the context menu and Panel properties tab. Integrated Quick Launch bar and the CPU performance monitors are good add-ons. Some other useful functions in the Sidebar include Newsroom, Media Player, Stock market quotes, and a Microsoft Outlook panel for quick access to your mail.
To insert custom panels, right-click on the Sidebar title and select Add panel from the context menu. There are quite a few built-in panels, but if you need more functionality, click the Plug-ins button to be directed to the official website where you can browse and download free skins and utilities.