Trim Outlook Inbox Bloat By Automatically Separating an Attachment from Outlook Emails
Attack Outlook Inbox Bloat
Every time a message with an attachment enters the Outlook inbox, the software stores it and the attachment in the Outlook data file. The ability to automatically separate an attachment from Outlook email with a single mouse click makes it possible for users to control the size of Outlook data files, making them easier to search and back up.
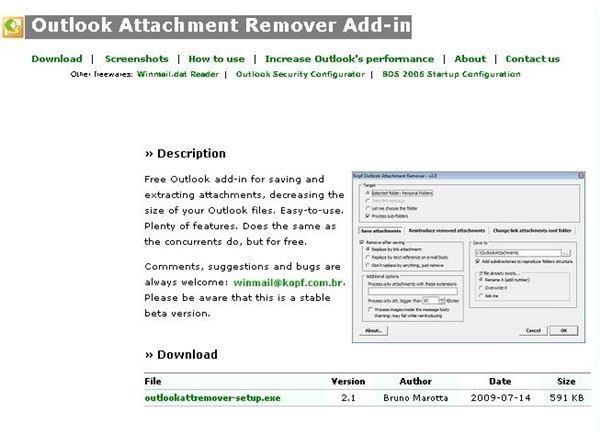
An Outlook add-in called Kopf Attachment Remover makes this possible. This application stores email attachments in an external directory and optionally inserts a convenient link to its new location in their matching email messages.
Outlook users can learn to manage attachments effectively in a way that will reduce Outlook storage and improve overall performance.
Get The Kopf Outlook Add-In
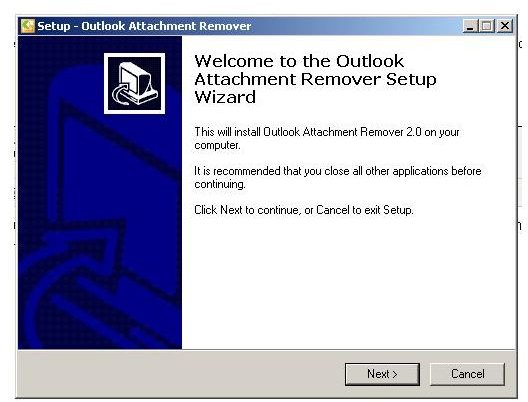
Outlook users begin effectively managing Outlook attachments by visiting the Kopf developer’s site to download the attachment extractor add-in. Run the setup program and follow the instructions on the screen.
They must close Outlook before clicking the “Next” button when the first window appears.
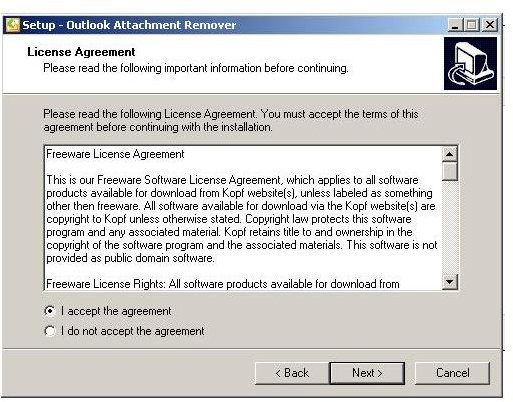
When prompted, users should accept the freeware license agreement and then click the “Next” button.
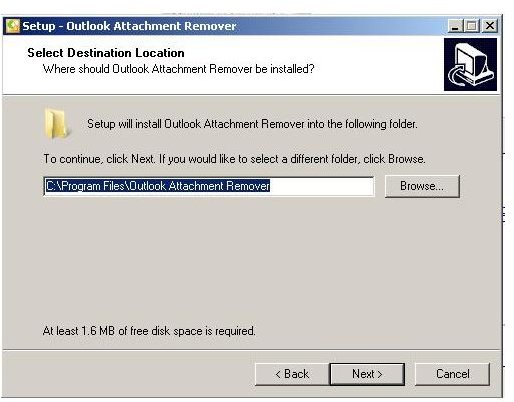
By selecting the destination directory or choosing the default setup location (C:\Program Files\Outlook Attachment Remover), users determine where to store the add-in. They should click the “Next” button to continue the installation.
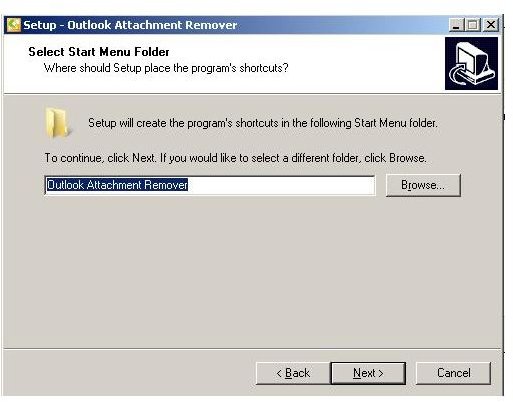
In the next window, users either enter or confirm the name of the program group used for the add-in, where the application will appear in the Windows start menu. Click “Next” to continue with setup.
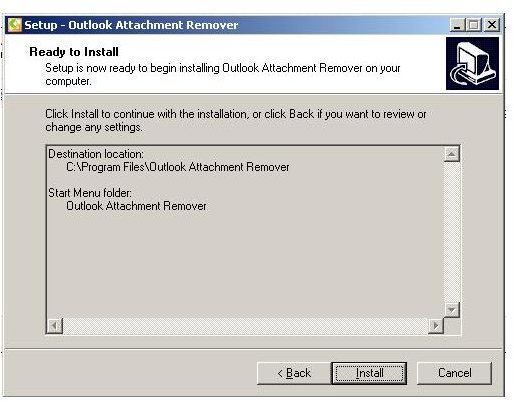
When the “Ready to Install” window appears, a click on the “Install” button will install the add-in application. Most computers quickly install the Kopf utility, so users should not expect a long wait. Clicking “Finish” will end the setup.
After installation of the Kopf Attachment Remover utility, users should open Outlook to configure the settings of the add-in.
Configure Kopf In Outlook
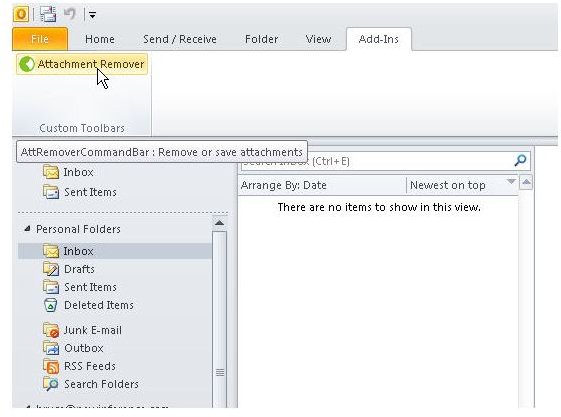
Outlook should start as usual and will allow users to configure the Kopf Attachment Remover. For Outlook 2007, this is done by clicking “Add-Ins” on the main menu and then clicking on the “AttRemover Command Bar” button.
Users find all the options that define how the add-in will automatically separate an attachment from Outlook email in the settings window.
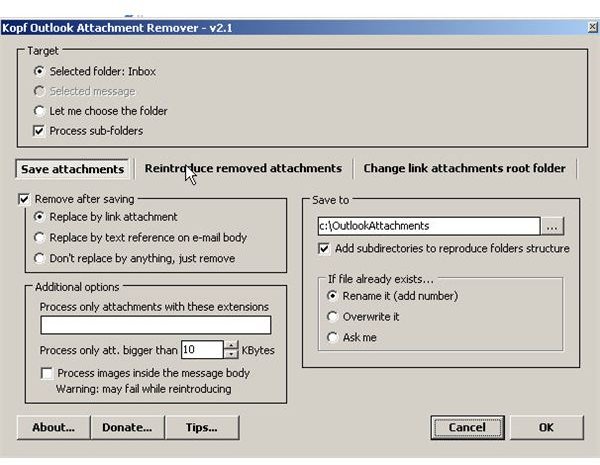
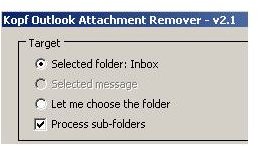
Kopf Attachment Remover gives Outlook users full control over what email messages are processed. Users can choose to process the Inbox, any other Outlook folder, or a single highlighted message. When users select a folder, they can decide whether to process sub-folders or just the folder root.
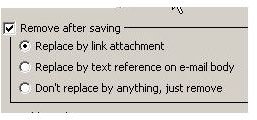
Other options allow Outlook users to choose to replace the removed attachment with a link to the removed file attachment, a text message referencing the file or nothing.
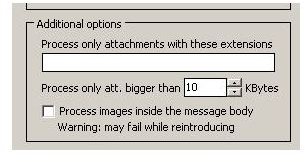
Other settings allow users to choose where to save the automatically-removed attachments and what to do if a duplicate file name exists.

Options to automatically strip certain types of files from Outlook emails are also avaialble.
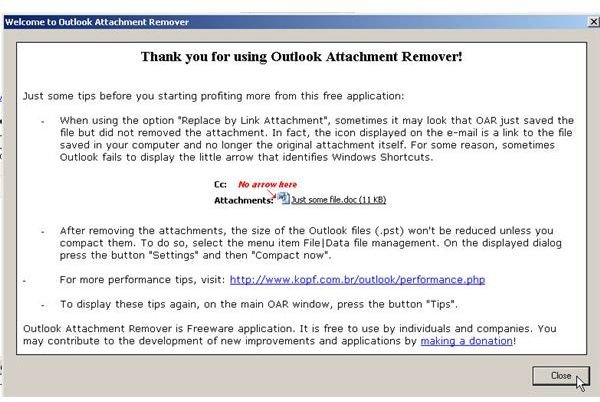
After setting the values in this screen, users should click the “OK” button to automatically save attachments to the specified folder. After the add-in runs for the first time, a “Thank you” window appears, giving users the opportunity to donate to the developer. Those who appreciate this powerful utility may wish to consider sending in a few dollars.
Demonstrating The Kopf Attachment Remover Add-In
Demonstrating how the Kopf attachment remover add-in works is easy using the following procedure.
1. Examine an email message with attachment.
Users should make sure that at least one email with an attachment is located in the Outlook Inbox. For this example, the email has a single 34 KB attachment.

2. Check beginning outlook data file size
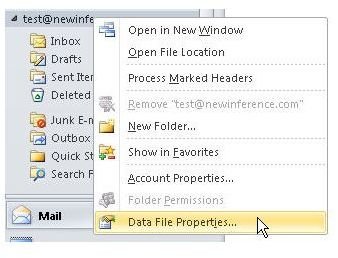
Before running the Kopf add-in for email attachments, users should look at the size of the Outlook data file in question. To do this, they right click on the email account listed in the left hand pane in Outlook and then choose “Data File Properties.”
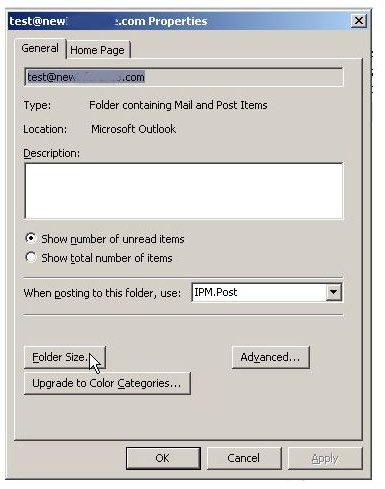
In the “Properties” window, clicking on the “Folder Size” button will reveal the starting size of the Outlook email store.
A small data file is found in this example because the inbox has only one email with just one attachment.
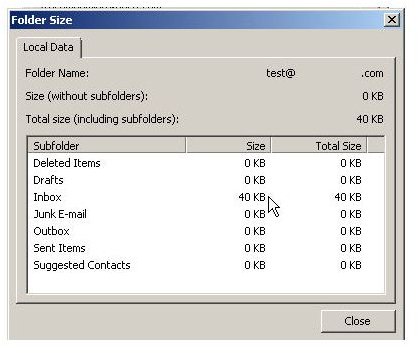
The folder size in this test account is just 40 KB, but most active Outlook data files are much larger.
2. Run the automatic attachment extractor
Users should click the “Add-Ins” tab on the Outlook menu and then click the “Attachment Remover” button. Next they should follow the instructions from the previous section of this guide to choose their email separation settings (For most users, no changes are necessary) and then click “OK.”
3. Examine results
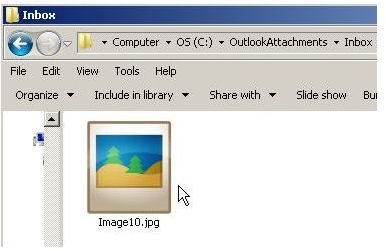
If the tool worked to automatically separate an attachment from Outlook email, a file will be in the Kopf destination folder. Users can verify this using Windows Explorer.
If users inspect the size of their Outlook data file, they should see that it is smaller than before because all email attachments have moved from Outlook data file into the Kopf destination folder. This example shows that the data file is now 11 KB, confirming that the attachment no longer resides inside the data file.
Process All Email Messages
After confirming that the Kopf Email Attachment Remover works, Outlook users will enjoy their new ability to separate Outlook email attachments automatically with a single click on the “Attachment Remover” button.
References
Screenshots provided by writer
“Outlook Attachment Remover Add-in”, https://www.kopf.com.br/outlook/