How to Create a Basic Table in Microsoft Word 2007
Creating Tables in Microsoft Word 2007
Have you ever tried reading a document that was filled with paragraph after paragraph of data descriptions? Not only is it difficult to digest information that is presented in this type of format, but it can get pretty dry and boring really fast. Instead, it’s often better to present your data using a chart or table. This helps readers focus in on the important information they need to know, and it has the side bonus of making your overall document more visually appealing.
There are several ways to create tables in Microsoft Word 2007. In this article, we’ll start by looking at the basic methods used for table construction. We’ll dig deeper into more advanced concepts later in the series.
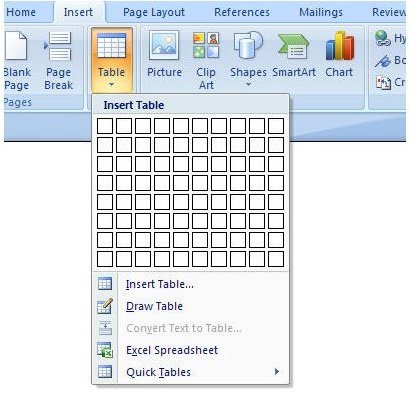
To begin, navigate to the Insert tab on the Word ribbon and click on the arrow underneath Table. This will open up a new box with several options for creating a table. (Click the image below for a larger view.)
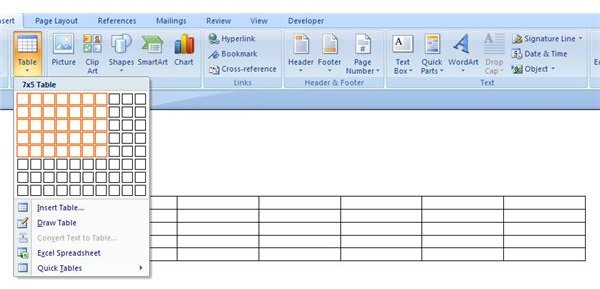
The first thing you’ll see on this tab is several rows of squares. If you want to create a table with just a few rows and columns, you can drag your cursor over these squares to select the layout. As you move the cursor, you’ll be able to see a preview of the table behind the Insert Table window on the Word document.
While this option is quick and easy for small tables, it doesn’t work very well if you have a larger layout in mind. For larger tables, it is better to use either the Insert Table or Draw Table option. We’ll go into more detail about Microsoft Word’s ability to draw tables in Part 2 of this series.
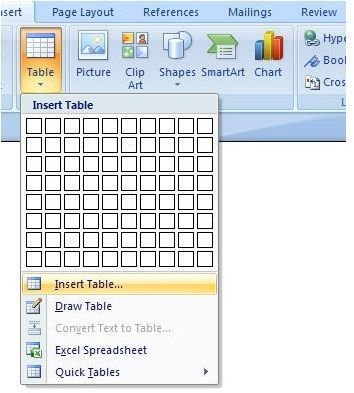
If you select the Insert Table option, a dialog box will appear where you can enter more exact specifications for the table. For now, we’ll only worry about entering in values for the Number of columns and Number of rows.
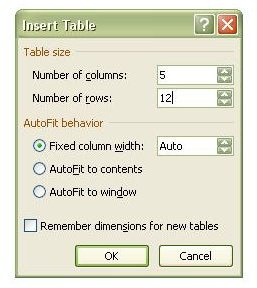
At this point, you can also specify information about AutoFit Behavior. In addition, if this is a table layout that you’ll be using on a frequent basis, you have the option of checking the box next to Remember dimensions for new tables. Doing this will cause Word to use the number of columns and rows you have chosen as default values whenever you use the Insert Table option in the future.
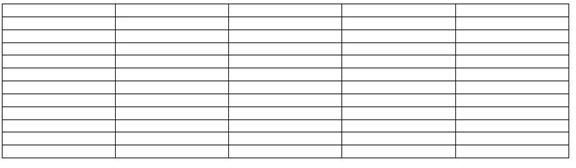
After you’ve entered all of your information, click OK to continue. Your new table will appear in the Word document as in the screenshot below.
Microsoft Word’s Quick Tables
Another option for table creation in Microsoft Word is the Quick Tables feature. These handy little table templates can be added with the click of a button and then modified to contain your own data.
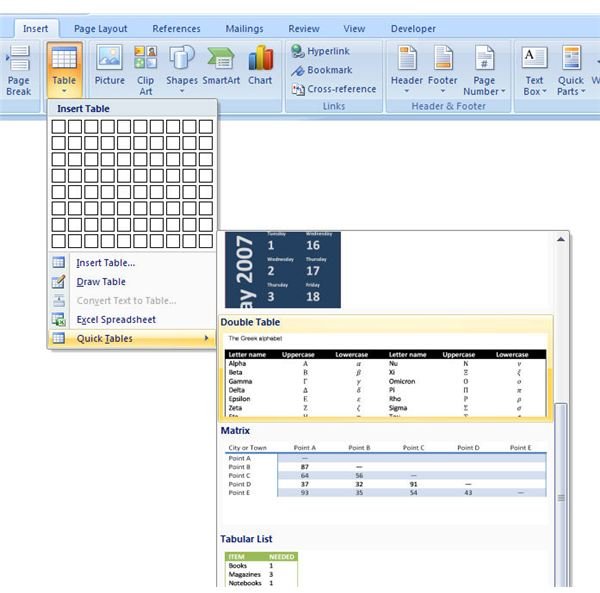
Basic table templates for calendars, mileage charts, and other common layouts can be inserted with this feature. To access them, select Quick Tables from the Insert Table dropdown menu. Then, you can scroll through all of the options available. Click on any of the layouts, and the table will be inserted into your document, ready for editing.

This post is part of the series: Using Tables and Charts in Microsoft Word 2007
In this series, we’ll take a look at how charts and tables can be used in Microsoft Word 2007 documents to help illustrate important concepts and keep the reader’s attention.