How to Use Windows 7 Snipping Tool
What is the Windows 7 Snipping Tool?
The Windows 7 Snipping tool is a screen capture software that is very useful for web designers, freelance writers, and anyone else who has to take a lot of screenshots. The Windows 7 screen capture tool comes with the operating system and is free to use whenever for whatever. It is a nice feature to have because you do not have to run around looking for a nice program that takes screenshots and allows you to save them. In this guide, I will show you how to use the snipping tool to take sceenshots.
How Do You Use Windows 7 Snipping Tool?
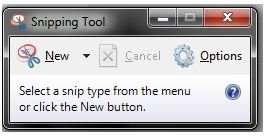
To use the snipping tool, you will first need to open it by clicking the Start menu and locating the snipping tool. Once you have located it, click it and you will see a small box open. In the small box, you will see the New button. There will also be an arrow button beside the

New button that you can click. This button will allow you to select what you want to capture. Select the arrow button and choose what you want to capture.
You will then need to load the window you want to capture. Click the New button on the box and the screen will have a white glare to it. If you chose to draw what you want to capture, you will need to use your mouse to draw the section you want to capture. If you chose one of the other options, you will simply need to click the area you want to capture. Once you have selected the area, the screenshot will open in the snipping tool window. From here, you can edit the screen capture if you need to by using the tools in the top of the window.
Changing Your Windows 7 Snipping Tool Options
You also have the option of changing your pen and drawing options. Let’s have a quick look at those. To open the Options panel, click Tools > Options at the top of your snipping tool panel. A box will open and you can change the color of your pen by dropping the ink box down and selecting the color you want. You can also check or uncheck the other options which includes hide instruction text, copy screen capture to clipboard, include URLs, and promt to save before closing. Any of the options you want to apply will need to be checked. If there are options checked that you do not want to apply, simply uncheck them. When you are finished with your options, click the OK button to close the box of options.
When the screenshot is like you want it, you can click the disk icon to save it. Save it to your computer by clicking Save on the box that opens. That’s how easy it is to capture screens using the Windows 7 Snipping Tool. For quick tips on using the screen capture software, see the tips section below.
Windows 7 Snipping Tool Tips
Here are some tips to keep in mind when using the Windows 7 screen capture tool.
- If you draw or highlight something and mess up, use the eraser tool and click it. It will automatically be erased.
- To change the ink color of your pens, click Tools > Options and drop the box to select the color you want to use.
- To email a screenshot instantly, click File > Send To > Email and follow the steps to send it through your email program.
Image Credits
All screenshots were taken by the author for educational purposes only.
Windows 7 Snipping Tool