
Microsoft Office 2010 features a slightly complicated installer screen and some new features that might throw even the most experienced user.
A Brief How to Guide for Office 2010
Microsoft Office 2010 features a selection of the most commonly used office productivity applications, with Word, Excel, PowerPoint and Outlook lining up alongside Access, OneNote , Publisher and various other smaller apps depending on which version of Office you have.
However installing Office and using it for the first time might cause some apprehension, despite the ease with which these applications can be used. Getting started with these tools really is easy, and by following this “how-to” guide for Office 2010 you will learn how to install the suite or individual applications as well as understand the basic functions of the main applications.
Installing Microsoft Office 2010
When you insert your Microsoft Office 2010 disc, depending on which edition you have purchased, you will be able to install either individual applications or the entire suite. The disc should autorun, allowing you to make your decision there and then.
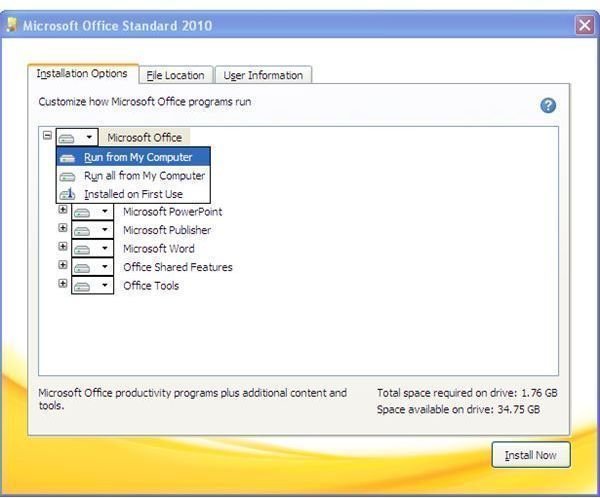
You will need to follow any steps displayed on screen, and agree to the Microsoft Software License Terms, and then choose to Install Now to use the default settings (such as file location and only installing commonly used application components) or Customize Settings in order to make changes to the default settings. On the Customize Settings screen you can use the Installation Options tab to specify which components of which applications should be installed, which takes up more space (identified in the bottom right corner) but saves you from having to use the disc again in future. This is most easily done by clicking Microsoft Office and selecting Run all from My Computer.
Meanwhile on the File Location tab you can specify a different default location for installation.
Proceed with the installation by clicking Install Now, and then sit back and wait while the suite of applications installs!
Basic Application How to Guide for Office 2010
The applications that comprise Microsoft Office 2010 are quite different; Word is a word processor while PowerPoint is used for creating and editing presentations.
However each of these component applications features an almost identical user interface, designed to add familiarity to anyone using them for the first time. While each has its own set of tools particular to the tasks being performed there are some standard functions that can be accessed via the File and Home menus.
In the File menu tab, you will find the controls to Save, Save as, Open and Close a document, along with the New, Save and Send, and Print functions. These are the most common non-document tools used in Microsoft Office 2010, and will help you to perform all of the basic saving, storage and printing tasks.
Meanwhile, the Home tab will provide various formatting options for whichever application you’re using, offering the ability to change font, increase font size and change color, apply right, left and central text justification, bullet points, and much more.
As you will notice, the various tabs and menu items are well organized according to function. This is thanks to the innovative “ribbon menu” used by each of the applications but if you’re not entirely happy with it you can either customize the ribbon or you might even hide it completely !
Getting to grips with these basic tools is the first step to understanding Microsoft Office 2010 !
References
Source: Author experience
Screenshot: Author


