How to Guides: Print from Macintosh to Windows Computer Network
Printing from Mac to Windows Network Printer
It isn’t so long ago that the differences between an Apple Macintosh and a Windows computer prevented both pieces of hardware being present on the same network. Network printing was completely out of the question!
Things are different now, with Apple taking steps to make their computers more relevant by replacing the old PowerPC processors and architecture with Intel chips, the same processors used in many Windows PCs. As a result, compatibility between the two systems has improved over the years, and networking a Mac and a Windows PC is now possible.
Let’s look at how to print from an Apple Macintosh to a Windows computer network…
Printing from a Mac to a Windows Computer Network
The first thing that you need to do is make sure that your Mac is correctly setup on the Windows network. This is something that should occur pretty seamlessly these days, so as long as you’re using a modern Mac with at least Mac OS X installed you shouldn’t have any real problems, although for best results you should be running a modern device with an Intel chipset.
Once your Mac is plugged in and connected to the Windows network, adding a new printer should be as easy as connecting to a network drive. Note however that you will not be able to engage in any advanced configuration of the printer from your Mac.
Adding a Windows Network Printer to your Mac
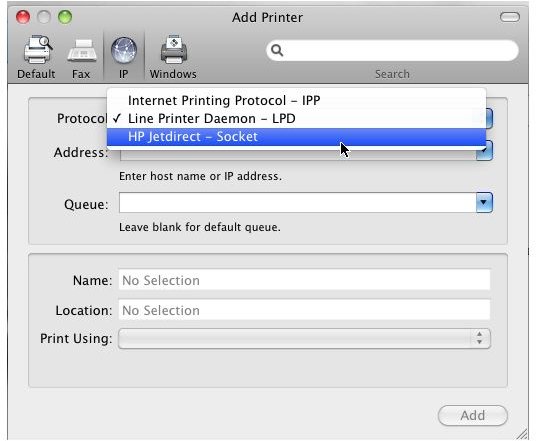
So to add a Windows network printer to your Mac, go to System Preferences > Hardware > Print and Fax. In the left-hand pane, click the + button to begin adding a printer.
Using the IP button, in the Address section enter the name of the print server and printer name, in the printserver/printer convention. Mac OS X should then attempt to detect the printer and complete the process of adding it to your computer. You don’t have to stop with a single printer either, just click the + button again to add more printers, and use the - button to remove them.
Note that some print servers may require you to use the IP address.
Using a Windows Printer from a Mac
Printing from Word for Mac: 2011 to your Windows network printer (or indeed from any application) should then be a pretty simple task of using File > Print (or COMMAND + P) to open the printer dialogue box and printing as many copies or individual page as required.
Additionally you should also be able to change the default paper size that the printer is setup to use, ensuring that the document you are printing from your Mac is correctly sized. This might require a small amount of testing to confirm that your settings are correct, but after the first couple of attempts you shouldn’t have any problems.
References
Source: author experience
Images: screenshot by author