How Do I Install Windows Live Messenger? Tips for Setting Up Your Microsoft IM Account
The Evolution of a Classic
Over the years, Microsoft’s instant messenger client has evolved to meet the ever demanding needs of its users. Today there is more competition than ever for programs like Windows Live Messenger, so Microsoft has worked hard to ensure that the latest version has what it takes to stay on top of the pack. The latest version allows HD video chats, messages that can be sent to mobile phones, social network updates, and more. So, if you are ready to add a new dimension to your online chats, you should try the latest Windows Live Messenger.
How Do I Install Window Live Messenger?
1. Windows Live Messenger is now part of the Windows Live Essentials suite, so the first thing you need to do is download the installer from the Windows Live site. You can do that here.
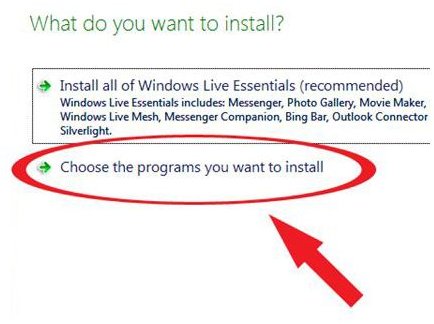
2. Double click the file you downloaded to run the installer. Once it loads you will see you have two options. One is to install all the Windows Live Essentials programs, and the other is to pick which ones you want to install. Today we are just going to install Windows Live Messenger, so select Choose the programs you want to install.
3. On the next screen, uncheck all the boxes except the one next to Windows Live Messenger, and then click Install.

4. After the program has finished installing, it should automatically start up for you, but if it doesn’t, you will still be able to find it by going to your Start button and selecting All Programs.
Setting Up Messenger
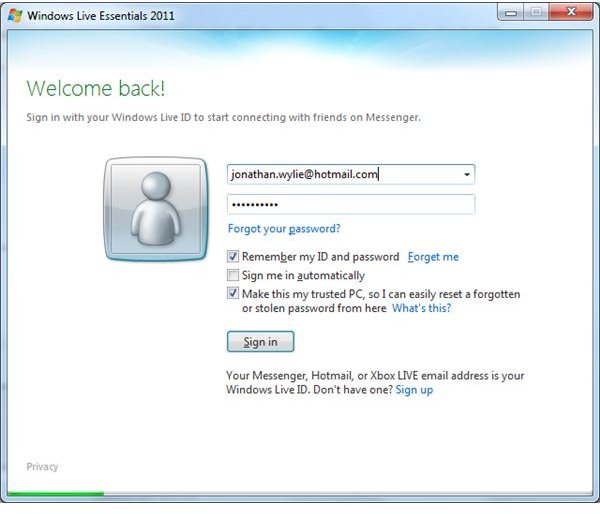
1. When you start Messenger for the first time, you will need to sign in with a Windows Live ID. If you don’t already have one, simply click the link at the bottom of the window to sign up. Otherwise, type in your email and password, then click Sign In.
2. You will then be prompted to choose a picture for your Messenger account. If you have a webcam plugged in at this time you may get the option to take a picture right now, but you can also choose to browse the pictures on your computer and add one of those. This picture will be seen by all people that you connect with via your Windows Live Messenger account. If you don’t want to add a picture at this time then simply click Skip.

3. Now you can choose whether or not you want to connect your Messenger account to your social network accounts. At this time, you have the option of connecting with Facebook, MySpace and LinkedIn. Simply click on the one you want to use and follow the authentication prompts for each.

4. The next step is adding your mobile phone number. This gives you access to text messaging features and can even help with things like password resets. It will also appear on your Messenger profile, but you can choose to hide this later or simply bypass this option altogether by clicking Skip.
5. Finally, select your desired privacy settings from the options provided and click Close. Messenger will now restart and be ready to use.
More Options
If you ever want to change any of these settings, simply click on your name in the top right hand corner of the Messenger screen and select More Options. This will allow you to customize your Messenger experience so that it works exactly the way you want it.
Now you can be sure that the next time someone asks you, “How do I install Windows Live Messenger?” you will have all the answers they need.
This post is part of the series: Windows Live Essentials Install and Setup Guides
This collection of articles will give you hints and tips on how to install and set up some of Microsoft’s most popular free programs from the Windows Live Essentials Suite.