How to Perform A Vulnerability Scan Using Nessus
Overview
In this step we’ll download and install Nessus. Before you get started, make sure the machine you are installing Nessus on meets the minimum system requirements.
Note that Nessus is free for personal use, but commercial organizations need to subscribe to the Nessus “Professional Feed”. In order to use Nessus, you will need an activation code. If you are a home user, you will want a “Home Feed” code whereas if you are at a commercial business, you will need the “Professional Feed”. Note that you can evaluate Nessus on a 15 day trial using the Professional Feed. In this walkthrough, we’ll download and use an Evaluation Professional Feed license.
System Requirements – Supported Operating Systems
- Red Hat ES 4,5
- Fedora Core 10,11,12
- Debian 5
- FreeBSD 7
- Ubuntu 8.04, 8.10, 9.10
- Mac OS X 10.4\10.5
- Windows XP, Vista, Windows 7, Server 2003, 2008
- SuSE 9.3, 10
- Solaris 10
System Requirements
- 1GB RAM – up to 4 depending on size of network scanned
- Pentium 3 processor @ 2GHz+
- Unix: OpenSSL, zlib and GNU C Library
- Windows: Some performance issues with Windows XP SP2+
- Adobe Flash Plugin
Installing Nessus
-
Go to here and click the link to obtain an activation code. Click on the Professional Feed or Home Feed option. Request an evaluation license, fill out the requested information and wait for your activation code to arrive via email.
-
Next, go to the Nessus site and download Nessus – available here. Double click the installer. Click Next on the first screen.
-
On the License agreement screen, choose the “I accept the terms in the license agreement” radio button and click Next.
-
Choose a destination folder to install Nessus to and click Next.
-
Choose the Complete installation and click Next.
-
Click Install. After the program has finished installing, click Finish.
-
A new desktop icon should appear after the installation completes. Double click on Nessus Server Manager.
-
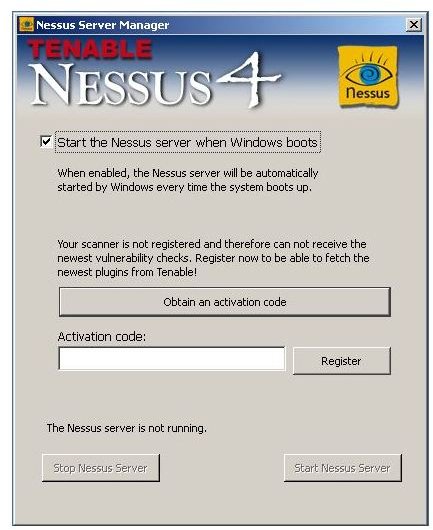
Nessus will ask you to enter your activation code (Figure 1). Enter the code you received in step 1 and click “Register”. Nessus will start downloading and installing the plugins that enable Nessus to perform scans. This process may take a while (30+ minutes) depending on the speed of your computer.
-
The server manager will be left open when the plugin installation finishes. Click on the “Manage Users…” button.
-
Click the “+” button to add a new user. Enter a username and password, select the “Administrator” checkbox and click Save.
-
You can close the window – Nessus will run as a service.
Configuring a Policy and Running the Scan
Before you can run a Nessus scan, you’ve got to create a policy.
-
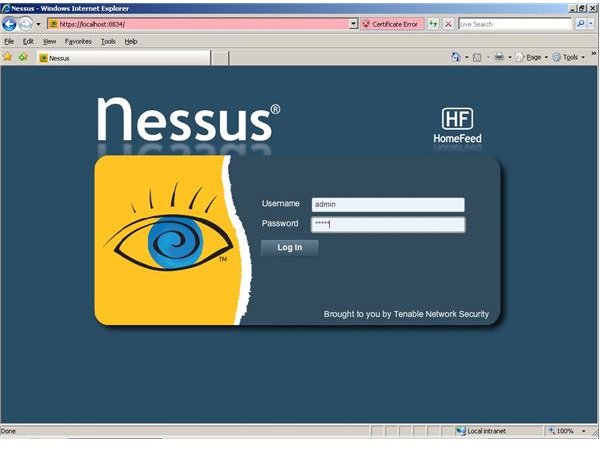
Open up the Nessus interface by browsing to https://localhost:8834 on the machine where you installed Nessus (Figure 2). Enter the username and password created earlier and click Log In.
-
Click on the Policies tab at the top of the screen.
-
Click the Add button to create a new policy.
-
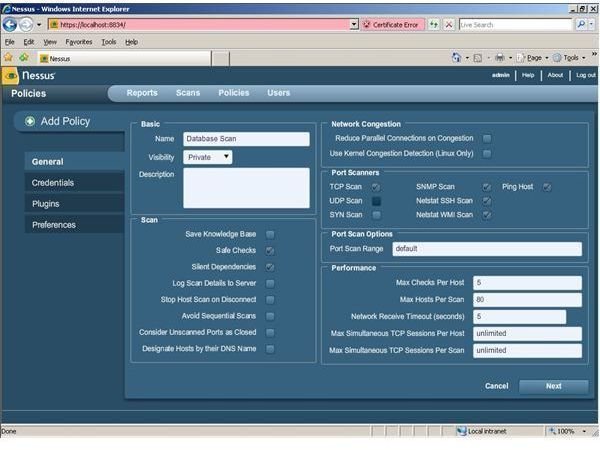
Give the scan a name and make sure “Safe Checks” and “Silent Dependencies” are checked – leave the remaining scan options on the default settings (Figure 3). Click Next.
-
Enter credentials for the scan to use. You can use a single set of credentials or multiple sets. Click Next when you’re ready to continue.
-
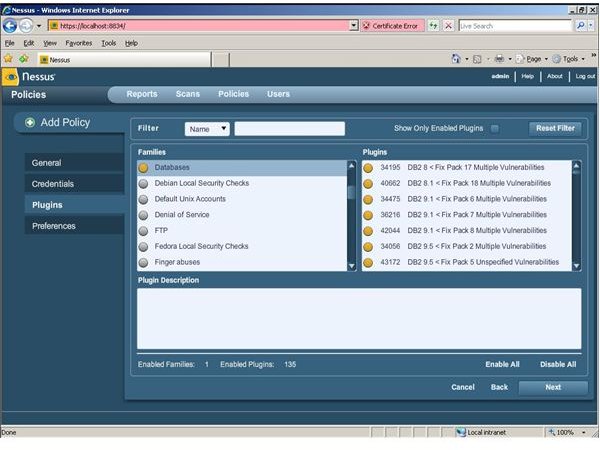
The plugins tab will let you choose which families of scans you’d like to perform. Nessus will have a default set of plugins selected. Click the Disable all button. Scroll down and left click on the grey circle next to Databases (Figure 4). This will enable all database scans. Click Next.
-
On the preferences screen, you will need to tailor the preferences to the database you are scanning. In this example, we’ll select a DB Type of “SQL Server” and SQL Server auth type of “Windows”. Click Submit to finish.
Using Nessus – Scanning a Database
-
In Nessus, click the Scans tab and then click Add.
-
Give the scan a name and select the policy you set up earlier.
-
In the Scan targets box, enter the list of machines you wish to scan. You can also import a list using the Targets file box. Click Launch Scan to begin the scan.
-
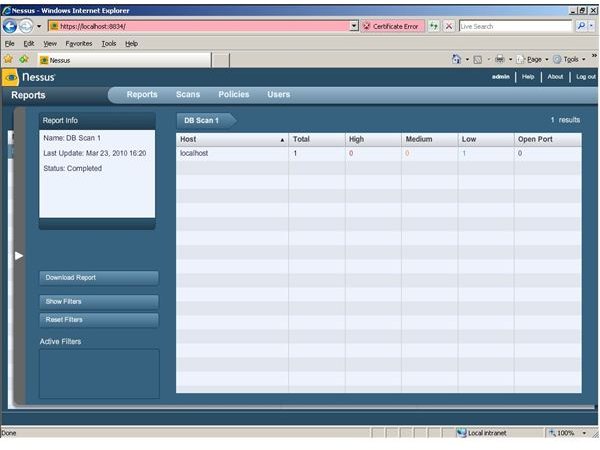
Depending on how many devices you are scanning, Nessus may take a while. When the scan is complete, you can go to the Reports tab and drill into any issues found (Figure 5).
That’s it! Pretty simple. Nessus is a great tool for discovering vulnerabilities in your network – just be sure to run frequent scans and also be sure to update the plugin repository frequently.