Fixing Mac Printer Problems the Easy Way
Print A Test Document
Before we begin with our testing, it is advisable to first print a test page. Most printers come with a test page feature, if yours also has it, try to print one. If it doesn’t have this feature then follow these steps to print a page from Microsoft Word:
-
Open MS Word.
-
Open the File menu and choose New Blank Document.
-
In the new document that opens, type in at least one line of text and also insert some graphics.
-
In the File menu, click on Print.
-
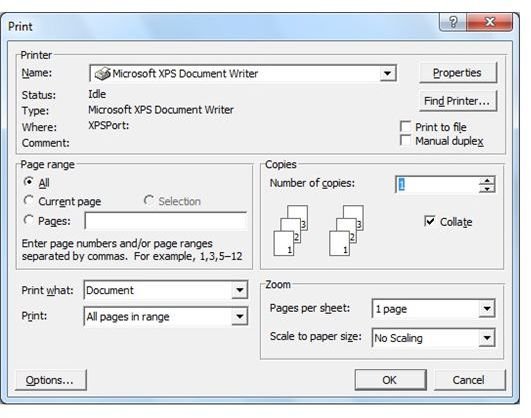
A print dialog box will pop up. Ensure that the correct printer is selected and that the settings are suitable for the printer.
- Click on Print.
If images are not printing, check that the Drawing Objects option is selected. To check this, do the following:
-
From the Tools menu, choose Options.
-
In the Print tab, select the Drawing objects option.
Try to print again and if it is still unsuccessful, try other methods mentioned below
Check Cables And Connections
Unplug and plug again every cable between the Mac and the printer. Also ensure that the cables are firmly connected. If you use USB cable to connect the printer, ensure that the cable is not faulty. To do this, open Apple System Profiler and click on Devices and Volumes tab. If you do not see any printer there, try another cable. If the printer is shown, try to connect printer to another USB port and then print again.
Update Or Reinstall Printer Driver
Check the printer manufacturer’s website for an updated version of driver. If you do not find any available update, it is not essential to update the driver. If you see a newer version of driver is available for your printer, download and install it.
Delete And Add The Printer
<strong>Delete a printer:</strong>
- Click on “System Preferences” in the Apple Menu.
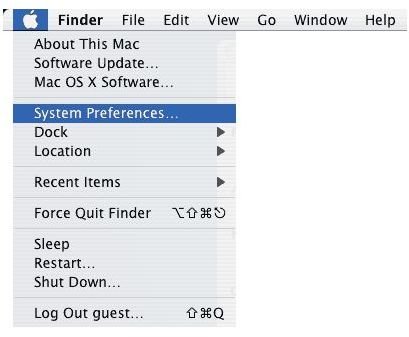
- Click on Print and Fax" icon to open “Print and Fax” preferences.
-
Select the printer you want to delete from the printer list.
-
Click the “-“button under the printer list to delete the printer you selected from the list. A warning box will appear, asking your confirmation to delete the printer. Click on “OK”
-
Your selected printer is now deleted.
<strong>Add a printer:</strong>
- Go to Applications > Utilities and click on Printer Setup Utility.
-
Click on the Add button on the toolbar.
-
In the new window that appears, select the printer type from the printer list.
-
From the printer list shown, select your printer’s name and model.
-
Click on the Add button.
Note: If your printer does not appear in the list, verify the printer is on, properly connected to your Mac and its drivers are installed (some drivers are not included in Mac OS X, in such a case, you need to manually add the device drivers)
Check The Status Of Background Printing
If you use Mac OS 8.X or 9.X, changing the background printing option also might help. The purpose of this option is to enable user to use the computer for running other applications while documents are printing.
-
Go to the Apple menu and select Chooser.
-
From the left-hand side of the Chooser window, select the type of printer you are using.
-
At the right-hand side, you will see the option for background printing. Turn it on or off.
Note: If the background printing option is not visible, you can not use this option for the selected printer. Also note that for some models of laser printers, this option is found in the Printing window.
4. Close the Chooser, try to print again.
Use The Latest Version Of Mac OS X
Always use the Software Update pane in System Preferences to check for any Mac OS X updates. If the issue still persists, contact the printer’s manufacturer for further assistance.