How to Add Clip Art to Microsoft Office 2008 for Mac OS: A Short Tutorial
Adding Clip Art to MS Office 08 for Mac OS
Clip art comes in handy when you’re working on documents on MS Word or Powerpoint. They’re great for adding visual elements to your presentations or newsletters. Although Microsoft Office 2008 comes with a small clip art library pre-installed in your computer, chances are, you will need different clip art that are not available on your computer at some stage.
The good news is that you can easily access a huge library of clip art on the Microsoft Office site. Clip art and other media categories available include: Abstract, Academic, Agriculture, Animals, Arts, Astrology, Backgrounds, Black & White, Buildings, Business, Cartoons, Character Collections, Colorful, Communications, Concepts, Decorative Elements, Emotions, Fantasy, Flags, Food, Government, Healthcare, Household, Industry, Leisure, Maps, Nature, Occupations, Pastel, People, Personal Appearance, Plants, Realistic, Religion, Sciences, Seasons, Signs, Sites, Special Occasions, Sports, Symbols, Technology, Tools, Transportation, Travel, Weather, and Web Elements.
The best part: They’re all free for you to download and add to your own library at any time.
The not-so-good news: Adding clip art to your Microsoft 2008 library is not always so straightforward. It took me a while to figure out exactly what I needed to do. But, at least now, I can share what I learned with you so you don’t have to tear your hair out like I did.
Here’s a short step-by-step on how to add clip art to your computer’s library -
Adding Clip Art Tutorial Gallery

Step-by-Step Tutorial for Adding Clip Art on Mac OS MSOffice Library
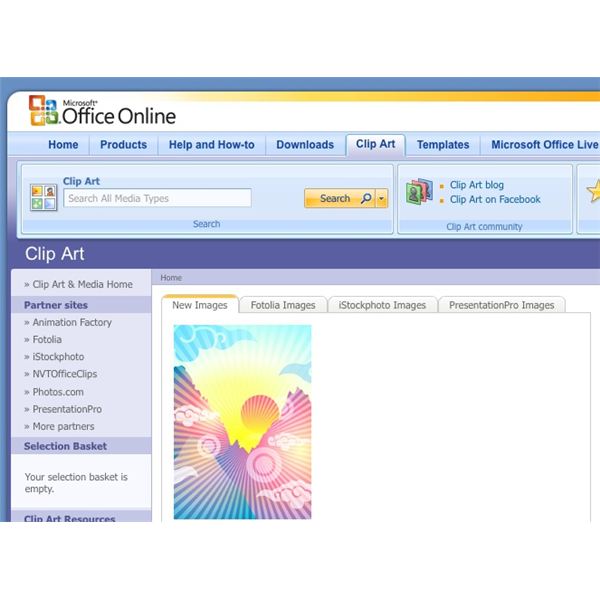
1. Go to Microsoft Clip Art and Media Library.
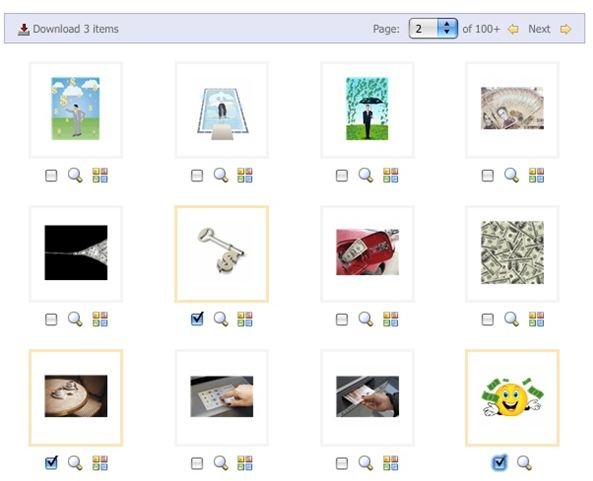
2. Choose the clip art that you wish to add to your own library. You can do a search by keyword or brows by category. You can choose as many clip art items as you wish. However, it’s probably best to download a limited number at a time, to make sure that your Internet connection holds up. You can always go back for more later.
- Once you’re done choosing, click on the Download link. You’ll find it on the left hand side of the top bar of the clip art site. You will also find the number of items you’ve chosen to download.
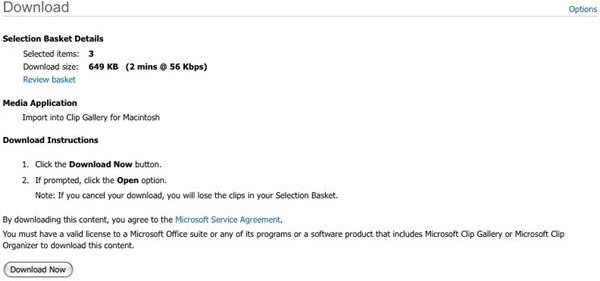
4. You will be taken to Microsoft’s Terms of Use page. You will need to agree to the terms in order to proceed with the download. After clicking on the agreement button, you will be taken to the Download page. You may opt to review your download basket on this page.
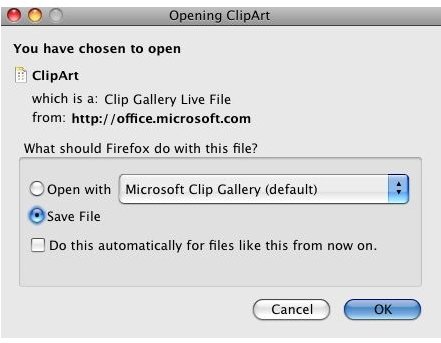
5. When you’re ready, click on the Download Now button. A pop up window will appear, asking you to open the file or to save it on your computer. Choose the ‘Save File’ option.
6. Go to the folder where you saved the file. You will find a file called ClipArt, with no extension on it.
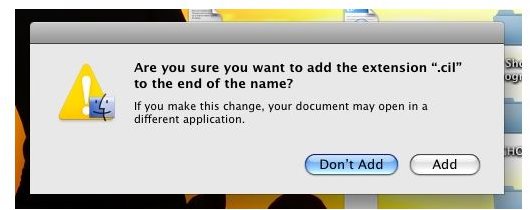
7. Add the extension .cil on the ClipArt file manually. Your Mac will most likely ask you to confirm whether you wish to the extension or not. Click on ‘Add It’. So, it will come out as ClipArt.cil.
8. Click on the ClipArt.cil file. It will then automatically add the clip art you downloaded to your Microsoft Clip Art Library.
All done! You can start using your newly downloaded clip art to any MS Office document.