Clean Up Your Mac by Organizing your Saved E-Mail
Clean Up Unwanted Email First
First things first. You need to get rid of e-mail you no longer need. To do this, you need to go through all of your current e-mail folders and start deleting stuff, and you can start with the Sent folder.
The Sent Folder
Every time you send a message to someone, a copy of it is saved in your Sent folder. You have to empty that folder occasionally if you want to prevent data from piling up. If you don’t move sent messages or delete them, they’ll be there forever. People who have used e-mail for a number of years are often surprised to find that thousands of messages have accumulated there.
Sent items are useful if you have a lousy short-term memory and need to recall if you actually sent an e-mail or didn’t and what you said. Sent items are also useful if you need to prove that you actually responded to an e-mail. Those messages are date and time stamped and can be used as evidence. For that reason, I suggest keeping items in the Sent folder but deleting items as they reach the two-month-old mark. Chances are good that if you haven’t been called on something in that amount of time, you won’t be.
Attachments
E-mail attachments are items that you add to an e-mail such as a picture, a sound file, a video, or some sort of document, spreadsheet, or presentation. Attachments can sometimes be quite large. How e-mail clients handle attachments varies. Most clients allow you to store the attachment on your hard drive and/or open it directly, without saving, and most denote an attachment with a paperclip icon.
Whether you save the attachment to your hard drive or not, the attachment still remains in your In box. If you delete it, it still remains as a file in your Trash folder. If you forward it, it’ll also be inside your Sent folder. Since some attachments, such as video, may be 2 MB or larger, having several copies of it in different folders can really eat up disk space. You need to be pretty careful with attachments.
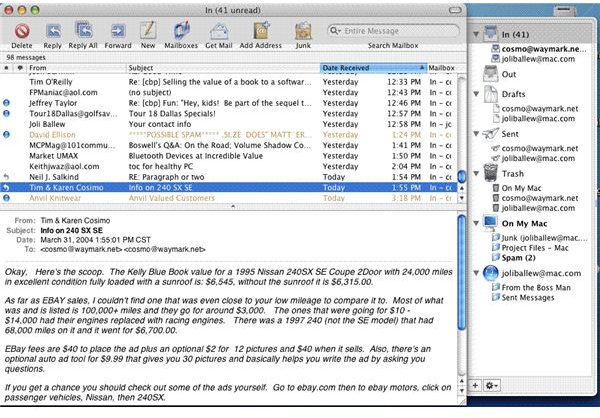
To be able to tell easily if an email has an attachment, make sure that the attachment column is displayed in Mail:
-
Open Mail and select the In box.
-
Control+click the bar that contains the From, Subject, and Date Received headings and check Attachments. [See Image 1]
-
Notice the new paperclip icon among the header choices.
Create an Organizational Structure
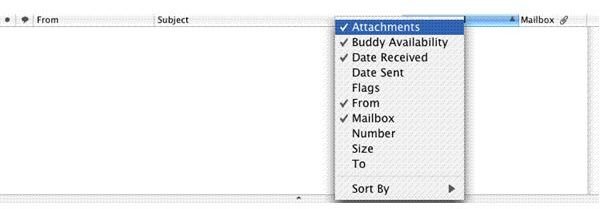
The single biggest way to get and keep Mail’s In box in shape is to create a hierarchy of folders and subfolders to hold and organize what you want to keep, just as you would with a real filing cabinet. Lucky for you, Mail comes with several folders already created: In, Out, Drafts, Sent, and Trash. Unfortunately, that’s like saying you bought a filing cabinet and it has five drawers. You’re going to need to create some additional folders if you want to get organized. You don’t want Mail to look like what’s in this image. [See Image 2]
Creating Folders and Subfolders
You’ll have to decide which folders to create by looking at what e-mail you want to keep. Think about the types of e-mail you receive and what they contain, and don’t think so much about who the mail comes from. When looking back for a saved e-mail, you might not remember who sent it, but you will remember what it was about. Folders should thus be about topics and not people. Here are some examples:
· Mail from your employer or team members
· Mail from clients
· Mail from iTunes
· Mail from a church or civic group
· Mail from your child’s school
· Mail from friends and family that contains specialty items such as digital photos as attachments.
· Mail regarding hobbies and interests
· Mail for a specific project
· Mail related to financial transactions
· Mail related to medical issues
· Artwork created for specific clients
Once you have a folder hierarchy in your head, put it to use:
1. Open Mail. (If you’re using a different mail client, you’ll find similar options for creating folders and subfolders. These steps will probably, very generally, work for you.)
2. Verify that the Mailbox pane is showing. If it isn’t, choose View>Show Mailboxes.
3. Control+click the In box. Select New. (Alternately, you could choose Mailbox>New from the menu bar.)
4. In the New dialog box, type a name for the new folder.
5. From Location, choose On My Mac if you want to create a folder for messages received from your ISP. If you have a .Mac account and you want to create a folder for filing messages from that account, choose the @mac.com option. Click OK.
6. Repeat these steps until all desired folders have been created.
Follow these steps create a subfolder inside a folder:
7. In the Mailbox pane, select the folder you want to create a subfolder in.
8. Control+click the folder and choose New.
9. Type a name for the subfolder and click OK.
Now, simply work through your In box and other folders, deleting items that are of no value, responding and filing those that do have value, and cleaning up that mailbox!
Images