How to Use an External Hard Drive with a Mac
Preamble: When You Should Get an External Hard Drive
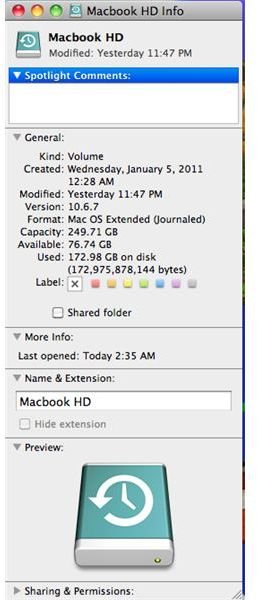
If you’ve had your Mac for a long time, you’re probably getting close to running out of space on your internal hard drive due to the various music or movie downloads you do, coupled with the programs you install and the pictures you upload. If this is the case, you’ll probably want to invest in an external hard drive at some point to store all of those files and save yourself the trouble of buying a new computer. To check and see if you’re running out of space, simply right click on your computer’s hard drive icon and select “Get Info”.
A new Window will pop up and you’ll see multiple fields, one of which will be called “Available”. This is the space available on your hard drive that you can still use. As you can see from the image on the right, I have 70GB or so left, so I probably won’t need an external hard drive quite yet. If, however, your “available” disk space is getting down below 10GB, it’s time to figure out how to use an external hard drive with a Mac.
Step 1) Buy an External Hard Drive
The obvious step, but worth mentioning nonetheless, is to actually buy yourself an external hard drive. Now, if you head to your local computer shop and ask for an “external hard drive”, you shouldn’t have an issue getting exactly what you need. Very rarely will someone give you an external drive that won’t work with your computer, and so whatever you get will suffice for now, but always remember the one rule of buying external hard drives:
Size matters.
Nothing else is particularly important, but for reference, make sure you get something that’s at least 500GB or larger. (Note: Terabytes (TB) are fine too)
Step 2) Plug It In and Format
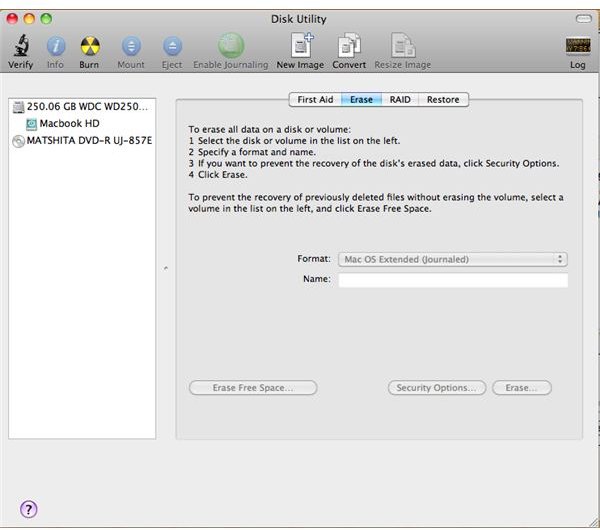
Your hard drive should come with some sort of either USB or Firewire connection cable, so the first thing you want to do is plug it into your computer. An icon should pop up on your desktop, but before you click it, you’ll want to open up a program called “Disk Utility”, which is built into every Mac. Highlight the external drive within Disk Utility and go to the erase tab. Format it to the MS-DOS (FAT) setting, which will allow you to use this hard drive on Mac computers and Windows computers. After the reformatting is complete, simply close ‘Disk Utility’.
Step 3) Start Using and Copying Files!
Now that your formatting is complete, you should be able to copy any files you want to the drive. To do this, you have two options. First, you can simply drag the files with the mouse directly onto the icon for the external hard drive and things will copy on their own. If you don’t like this, you can also highlight the files you want, right click (or “Option” click) and select “Copy X files”. Open up the external hard drive folder, and right click/option click again and select “Paste X files”. This will copy them all to the external hard drive!
Step 4) Removing Your Hard Drive
To finish and remove the hard drive, all you need to do is close the window of the drive, allow any copying files to finish and drag the hard drive icon into the trash bin. Once the icon disappears from the desktop, you can safely disconnect the drive from your USB or FireWire port.
References
All images are screenshots taken by the author.
All information came from prior author knowledge of the aforementioned programs and devices.