Mac OS X Guide: How Do You Setup a Dial-up Connection on OS X?
What You Need to Get Ready
Before you can connect to the Internet using your dial-up connection, you will need to perform a few tasks to get started. First, recent Macs do not come with a built-in dialup modem, so you will need to purchase an external modem that is compatible with Mac. While many retail stores sell dial-up modems, you can also check with your dial-up service provider to see if they have any equipment available. If you want an easy USB modem that is directly compatible with your Mac, visit an Apple Store and ask for the Apple USB Modem.
After you have your modem you’ll need to sign up for dial-up Internet access if you haven’t already. Your local telephone provider likely offers dial-up service, but you can try third-party providers as well. If you only plan to use the Internet a few hours a week, some providers have a limited use plan that is either free or very inexpensive. If you go with a third-party provider such as AOL, keep in mind that you may need to use specialized software for Web browsing, in addition to the steps you’ll configure like in this article.
Regardless of the provider you choose, you’ll need to gather some basic information before proceeding. Contact your provider and obtain a user account name, password and a telephone number to use to get Internet access. You’ll also want to follow your modem manufacturer’s instructions on how to connect the modem to your Mac and to your phone line. When you have these items and are physically connected to your modem, you’re ready to set up your Mac’s dial-up settings.
Configuring and Connecting to your Dial-up Connection
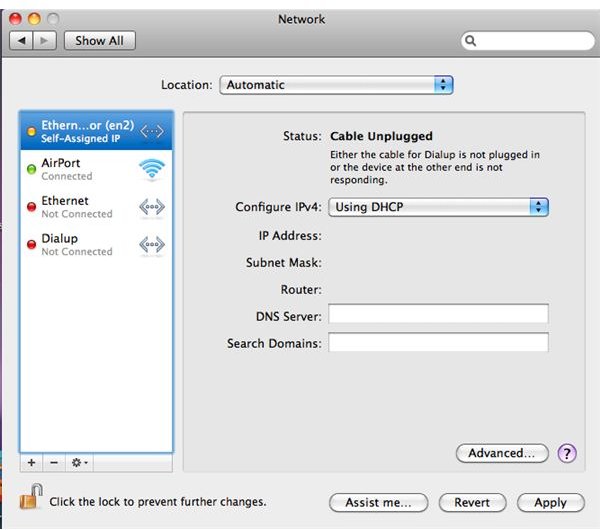
Configuring your dial-up connection requires that you set up your modem using your Mac’s networking utility. To do this, click “System Preferences” on the Dock and click “Network” under the “Internet & Wireless” heading. This launches the networking utility and displays a list of the connections your Mac can use.
Select your dial-up modem from the list on the left pane to view a configuration pop-up menu. Click “Add Configuration” and enter all of your ISP’s information, including login credentials and dial-up phone number in the applicable fields. Click “Save Password” if you want to remember the password in the future. At this point, you should be able to connect to the Internet unless your provider requires advanced settings. If advanced settings are necessary, click “Advanced” to view the additional settings.
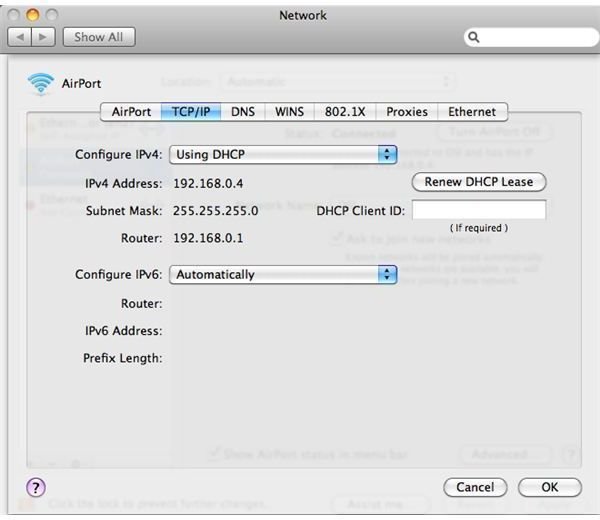
Unless your provider specifies that you need to use DNS server addresses manually, you’ll likely not need to do anything on the “Advanced” section. If you do make any changes, click “OK” to return to the main connection screen, then click “Apply” to save all your settings, including the login information.
Now that you’re set up, you can connect to the Internet. Simply select your dial-up modem from the list in the networking utility, then click the “Connect” button to dial in. If everything goes well, you should be able to view Web pages in Safari or connect to iChat. If something goes wrong, check out Apple’s Dial-up Troubleshooting page to fix any potential problems.
References
All screenshots taken by author and all references from Mac OS X Snow Leopard 10.6.6
Mac OS X Snow Leopard’s official page: https://www.apple.com/macosx/