Losing important data can be a nightmare. However, by following simple instructions you can easily recover deleted files and even entire filesystems. This article is a step-by-step guide to recovering lost data using an open-source data mining tool called PhotoRec.
File Recovery Made Easy
Whether you accidentally delete files from your hard disk or lose data due to disk crashes, it may just be your worst nightmare if you have lost important data. One way to recover the data is to hand over the hard disk to the manufacturer, pay a hefty sum and get the data recovered. Another way would be to simply recover the files yourself. In this article, we will show you how to use a simple tool to recover deleted files. We will use the Linux command line and an open-source software called PhotoRec.
What Happens
Linux filesystems store data in the form of data blocks. Generally data is stored in a continguous way to minimize data fragmentation and speed up access times. Therefore, when you delete a file from the hard disk (or any storage media for the matter), the file metadata is lost but the data itself is still present (the data blocks are just marked as available for writing). The data will remain on the filesystem as long as it is not overwritten by new data. Software such as PhotoRec are able to retreive this data, even after the filesystem has been formatted. This is known as data carving.
Therefore, the first rule is that if you want deleted files to be recovered from a filesystem, do not write anymore data to the filesystem. This maximizes the chance of accurate data retrieval.
PhotoRec
PhotoRec is a very powerful command line tool that was initially designed to recover picture files. However, PhotoRec supports 390 file formats, including the most popular formats. A list of all the formats PhotoRec supports currently is listed at https://www.cgsecurity.org/wiki/File_Formats_Recovered_By_PhotoRec . It is a part of the testdisk package and is licensed under the GNU GPLv2. It is cross platform and is available for Windows, Linux and Mac systems. Here, we shall concentrate on using PhotoRec on Linux.
Install PhotoRec
PhotoRec is available from https://www.cgsecurity.org/wiki/TestDisk_Download . If you are using Ubuntu, you can simply install PhotoRec by opening a terminal and typing:
sudo apt-get install testdisk
You will need administrator privileges for this.
Getting to work
Now that you have installed PhotoRec, let’s start. Open the terminal and run PhotoRec by simply typing:
sudo testdisk
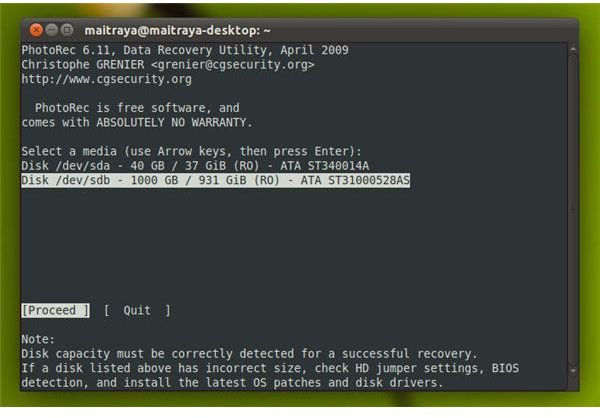
You will see something like this.
All the available media are listed by PhotoRec. Select the media from where you want to recover the files from.
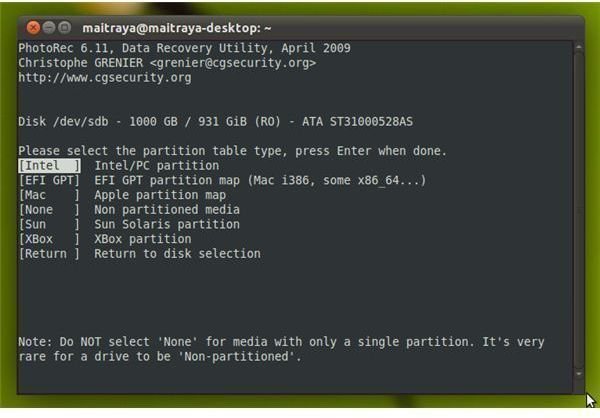
Next, PhotoRec asks for the partition table type. If you are unsure about this, go with the default option.
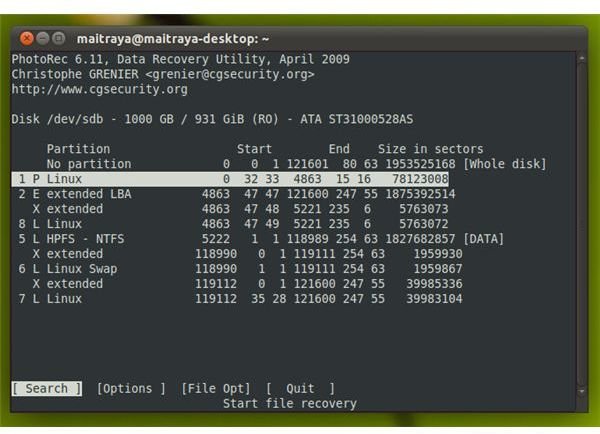
You are then asked to choose the partition from where you want to recover your lost files. Before proceeding, be sure to check out ‘Options’ and ‘File Opt’.
‘Options’ and ‘File Opt’
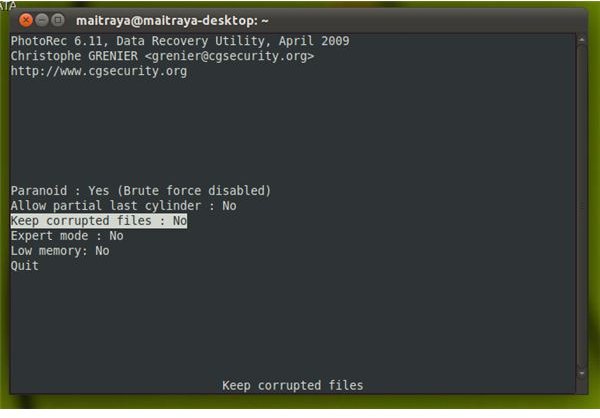
If you want to recover more fragmented files, enable the brute force option. However, this takes more time and is CPU intensive.
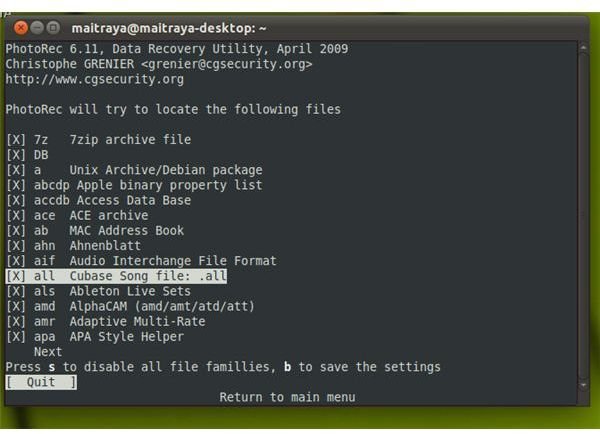
Next, go to the ‘File Opt’ and select the file types you want to recover. Not doing this will make PhotoRec recover files of all types.
After you are done, just press next to move forward.
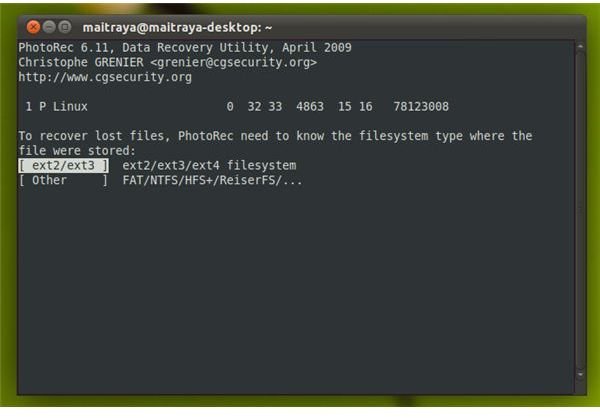
You are then asked to select the partition type. Most modern Linux system use ext4 partitons whereas older systems may use ext2 or ext3. Other partition types like FAT, NTFS, ReiserFS, etc are also supported.
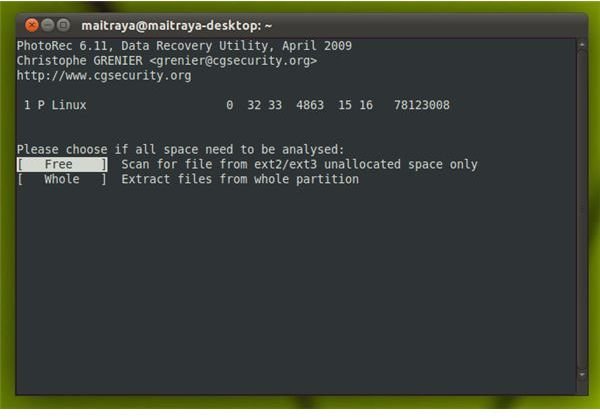
The next step is very important.
If you have a corrupt filesystem and would want to recover files from the entire filesystem, select the ‘Whole’ option. If you want to recover only those files which have been deleted, select the ‘Free’ option.
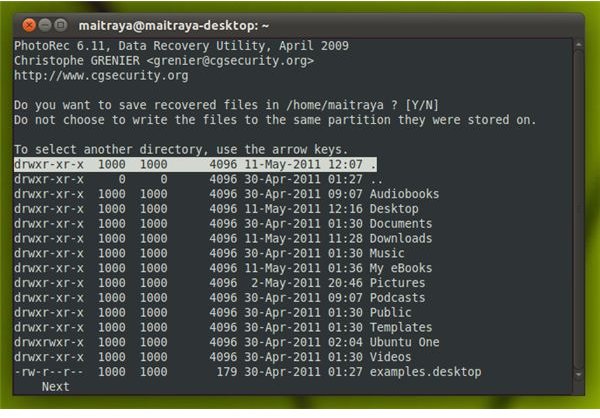
Now, select the location where you want to save the recovered files and press ‘Y’ for yes. Do not choose to write the files to the same partition they were stored on.
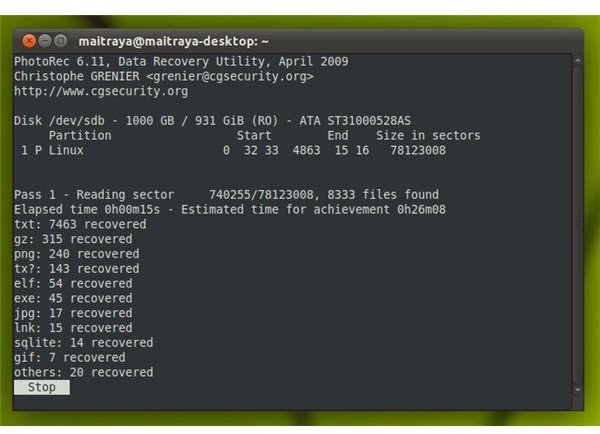
That’s it! Just sit back and relax while PhotoRec recovers the files for you.
Points to note
- Beginners may feel unconfortable using the command line to do this. Actually, using a command line is quite simple. PhotoRec is one of the easiest and most efficient command line tool available. Just follow the instructions correctly and you will be able to recover files easily.
- PhotoRec is open-source, which means that anyone can modify, distribute and share the software. It is available free of cost.
- Administrator privileges are required for running this program. If you do not have super-user privileges, contact your system administrator.
- Ubuntu 11.04 was used for running PhotoRec. However, you can follow the same steps for other distros.
References
- The PhotoRec official website
- Adrian Crenshaw, Data Carving with PhotoRec
- Data Recovery, Community Ubuntu Documentation
All images have been provided by the author.


