Introduction to Router Configuration
Step 1
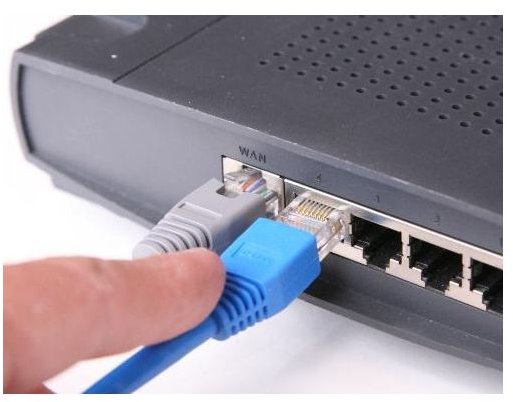
The first step is the most important. Many routers offer wireless capability, but for setting up a router for the first time, even the wireless routers need to be first connected to a computer via cable. After the initial setup, the cable can be removed and if the computers and laptops that will connect to the router are Wi-Fi enabled, they will be able to do so wirelessly.
Connect the router to the LAN port on a computer via cable and switch it on.
Step 2
On the computer to which the router is connected (via cable) open the internet browser and type the web address for your router. This web address is actually a network address that gives access to your router via your Network Adapter Card, to which the router is connected via cable. Since this is not a live internet connection, no internet connectivity is required for the process.
Most routers are reachable on the address https://192.168.1.1, but it may vary. The owner’s manual that comes within with the router should refer to the correct IP address to your specific router in case it differs from 192.168.1.1.
Step 3
Once the address is entered in your internet browser, the router interface will load and it may request for a user name and password. If it does, the information required will be found at the paperwork that comes with router at purchase, or at the owner’s manual itself.
Enter the user name, password, and login. You will be able to change the security login information after you login the first time, if desired.
Step 4
Most DSL routers will require a PPPoE User Name and Password for your internet connection via your router. This information is available from your own records or from the Internet Service Provider. Some static IP Internet Connections and Cable Modems will also require User Name and Password information.
This information is only entered once, and for future reference, a backup of your router settings can be performed for safety.
Some Internet Service Providers send their customers “proprietary” routers that are pre-configured with Internet Access information. If that is your case, you may not be able to change Internet Access Settings in your router, but your will have a “Refresh” button available that will renew old settings in case of a lost connection. This is a troubleshooting step in case of lost connectivity.
After entering your Internet Settings and security information, hit save or apply. However, some routers will not offer the Save or Apply buttons on their interface. Just keep in mind that the settings are automatically saved as you move to another page in the interface.
Step 5
If for some reason, you are required to enter or update MAC addresses, simply enter IPCONFIG /ALL at a Windows Command Prompt of the computer you wish to add to the router’s network and make note of the MAC address of the specific machine.
The MAC address needs to be entered in the relevant fields of your router’s interface and then saved in order to be allowed access to the network you are creating.
This rarely happens, but if it does just keep in mind that the MAC address of each machine you would like to have access to your router’s network can be easily acquired at the Command Prompt of each machine.
Step 6
It is safer, for privacy and security reasons, to change the name of your wireless connection. Simply click on the Wireless tab and change the SSID field to a less suggestive name. Names with numbers and abnormal characters are safer in what they deter the attempts of hackers in trying to break into your network and steal your personal information, or bandwidth.
Step 7
From a Command Prompt, perform an IPCONFIG test and check the results. When your DNS Server’s address is displayed as 127.0.0.0**,** it is a bad sign. This means that there is no connection between your router and your network adapter (computer). This test will assure you that your efforts were successful.
Simply open a Command Prompt by typing CMD and the Run feature of your Start menu and press enter. Then, type IPCONFIG and examine the results. A successful connection will display addresses such as 192.168.1.1 and 192.168.1.2, or different addresses if you are part of a bigger network, such as a large company.
Step 8
Test your Internet Connection by surfing on your browser. Visit your favourite place on the internet or check your e-mail. If everything works as it should, the router is configured correctly as far as DNS and internet are concerned.
Step 9
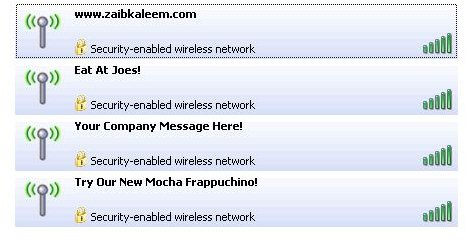
For WI-FI enabled computers, the SSID name you have chosen (changed) earlier will be visible as “Available Networks”. Connect by selecting the network that refers to your router by clicking on the name of your SSID.
Step 10
When you select your router’s name for connection, you will be required to enter your password, if your network is secure. In order to make your wireless network secure, you will need to set your security settings.
Click on the Security tab of your router’s interface and turn your firewall ON, in case it is OFF. Then click on the Wireless Security tab, select WAP-PSK level security. Enter your password and save or apply your changes.
WAP-PSK security is the safest level, as WEP has been notorious for security breaches.