How to Install a Dell Laptop Motherboard - Removing the CPU, PC Card Cage, and Motherboard Screws
Removing the CPU
The next item that needs to be removed is the laptop’s CPU. This is installed on the motherboard underneath the heat sink. To remove it, you must first remove the heat sink.
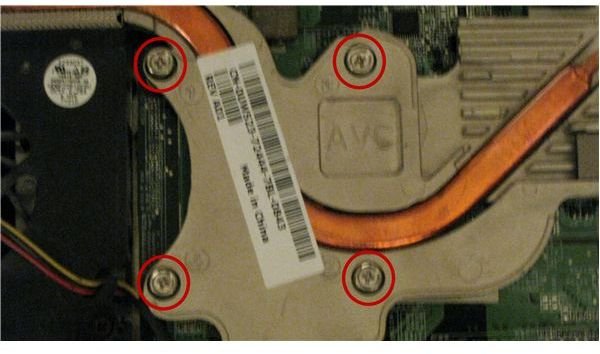
In the example model, there are four pressure screws holding down the heat sink. In other models there can be more, or less, but the principles are the same. Because of how these pressure screws work, it is best not to simply start undoing them. As you can see, they are always numbered in the order which they should be released. Another thing to keep in mind, however, is that if you fully release one screw the chances of others becoming cross-threaded is greater. I recommend that you only release each screw half way at a time, then go back and finish undoing them. Usually 3-4 screwdriver turns is about half of the screw.
Once the screws are released, grab the edges and lift off the heat sink.
Note about other models: Some of the more high-tech model Dell laptops will also have a heat sink installed on the video card. This comes off in a similar manner. If you’re ever in doubt about which things need to be removed from the motherboard for replacement and which don’t, simply look at your replacement board as a comparison.
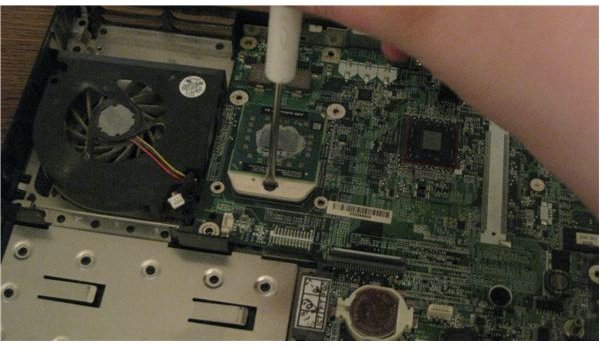
Underneath the heat sink you’ll find the CPU. Before you can remove it from the socket, you first need to use a flathead screwdriver to give the release latch a turn (see image on the left). Once released, grab the CPU by the edges and lift it straight out of the socket. Lay it somewhere very safe with the pins facing up. Never touch the pins. If you have a spare antistatic bag lying around, now is the time to put it to good use.
When you go to place the CPU into the new socket later, there will be a marking on the socket and on the CPU that correspond - of a small triangle in one corner. This indicates a place where there is no corner pin, allowing you to line of the CPU correctly. In the absence of a marking you can visually confirm the location of the “missing” pin.
PCMCIA Cage
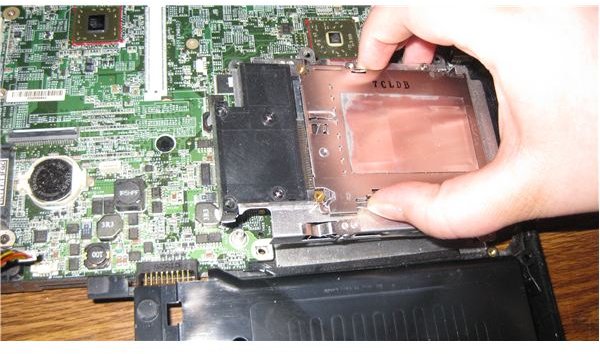
One of the last things that will usually have to be removed from Dell laptop motherboards prior to replacement is the PCMCIA (sometimes called Air Card or PC Card) cage. The appearance and connection of these devices varies greatly across motherboard models. Some are plugged onto the motherboard in addition to being screwed down. Others are nothing more than a glorified bracket allowing PC cards to be plugged directly into the motherboard. In our example model case, the latter is true.
Before you can remove the motherboard you first need to unscrew and remove the PC card enclosure. There are 4-5 screws holding this one down, though that number can vary quite a bit. Once unscrewed, simply pull the enclosure up and set it aside.
Motherboard Screws
Last but certainly not least, we need to unscrew the motherboard from the chassis. This is the last step, but is not as simple as it sounds. Normally, a white triangle would mark the screws that have to be undone to remove the motherboard. In some models, such as the Inspiron 1501, these marks don’t exist.
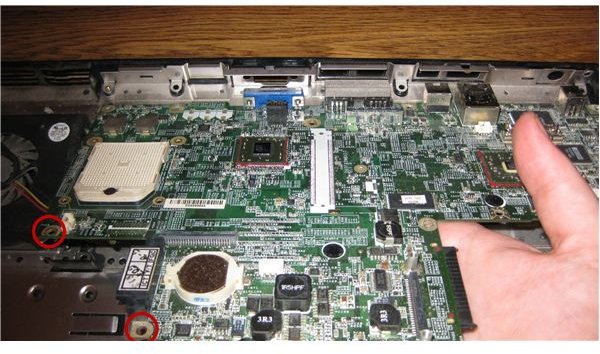
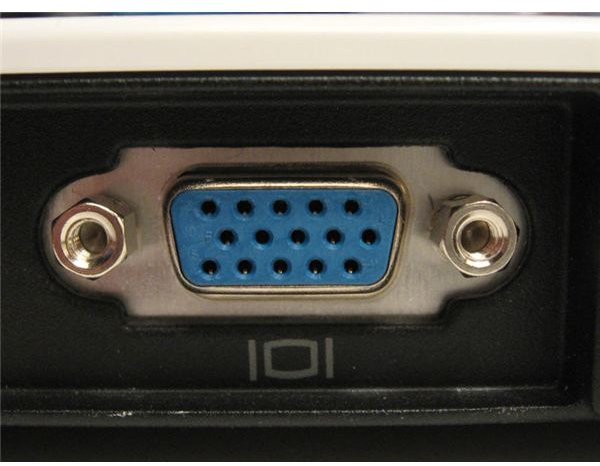
I ended up finding two screws that had to be undone to remove the motherboard, which are pictured below. However, those two screws weren’t all that was needed to remove the motherboard. There is an asinine design that is occasionally used in these Dell laptops where the VGA port connector screws double as motherboard screws. These have to be removed before the motherboard can be.
The easiest way to remove these screws is with a hex socket screwdriver head. If you don’t have one of those, you can use needlenose pliers to turn the screws, then finish undoing them with your thumbs.
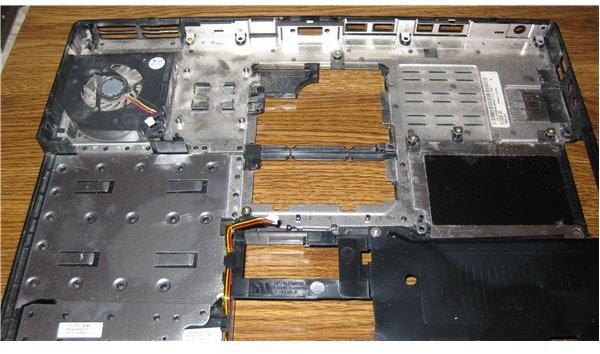
Once unscrewed completely, all you should have to do is gently lift the motherboard out of the laptop chassis. Place it in or on an anti-static bag.
Putting it All Back Together
I’m not going to walk through every step of putting your laptop back together with the newly installed motherboard because that would just be redundant. All you have to do is follow these steps exactly in the reverse order. In places where there might be confusion, I’m sure you’ve noticed my occasional notations about what to do during this phase. Just be sure to follow these steps - you don’t want to miss anything!
This post is part of the series: How to Install a New Motherboard in a Dell Laptop
In this series of articles we use a Dell Inspiron 1501 as an example model on how to replace the motherboard in a Dell Laptop. With extensive pictures and detailed directions, along with notes on common design variations, we make it possible for anyone to replace the motherboard in their Dell Laptop