How to Setup a Home Network? Easy Home Network Setup User Guide
Wired Networks
Sometimes people have all of their computers and devices in one large room, like an office. When this is the case wireless doesn’t even have to be considered. We can easily connect several computers, a printer, scanner or other devices, to each other and to the Internet using cables.
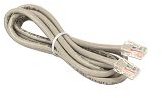
The cable of choice is simply known as a CAT5e (Cat Five E) and can be found at electronics stores.
Four devices can be connected to your average home router or wireless router. If you have more than that you can simply use a hub like this one, which acts as a sort of splitter to allow you to connect more devices to one router.
Once all of your computers are connected to the router with CAT5e cable, and the router is connected to the cable or DSL modem, you should be able to freely access the Internet from any of the connected computers. If there’s any problem, then reboot the modem, and reboot the router. This typically resolves any issues. If you bring up a command prompt (type “cmd” at the “Run” prompt in Windows) and type “ipconfig” it should bring up your computer’s current private IP address, assigned to it by the DHCP server in the router. It will probably be something similar to 192.169.1.X.
Wireless Networks
In previous articles we discussed how to configure your wireless router so as to broadcast a wireless signal throughout your house, as well as how to connect wireless-enabled computers to this signal. Wireless, as opposed to wired, networks have some advantages and disadvantages. The advantage is that you don’t have to deal with unsightly and sometimes costly cables. The disadvantage is that total security can never be achieved. In addition, wireless signals are slower and less reliable than their wired counterparts. Regardless of whether you want to do a wired or wireless home network, the principles are the same.
Connecting Computers to Eachother
Simply having your computers connected to a router for Internet access does not mean that they are able to access each others files, or even know the others exist. There are further steps that need to be taken.
The first thing you need to do is run the Windows Network Setup Wizard from the Control Panel. It will help you in setting up unique names for every computer on your network, and adding them to a workgroup. You will choose the setting for “This computer connects to the Internet through a Gateway…” and you need to choose to enable file and printer sharing.
The next step is to create identical user accounts on every machine. For example, if you have four computers and your name is Joe, you should create a user account on each computer called Joe, and use the same password. Leaving the password blank is not a good idea. You can name the user account whatever you’d like, but it needs to be identical on every machine, as does the password. Names like “Guest” or “Administrator” cannot be used, as they are default account names in Windows.
After you have done these steps, you should be able to access all the computers in your workgroup from My Network Places.
Printers and Other Devices
Some devices, like printers, are already network enabled, either with an Ethernet port or wireless. If you have a device like this, treat it the same as one of your computers. Connect it to the router (either wirelessly or with an Ethernet cable) and it will receive a DHCP address the same as your computer does. After that, install the printer software on every computer that will print to that printer.
Not all printers are network-enabled, however. In this case, they probably connect to one computer with a USB cable. You can still print to these printers however, from any of your computers, by taking advantage of the File and Printer sharing you set up above. Just install the printer’s software on every computer that you want to be able to print to it, and set it up using the Printers and Faxes feature in the Control Panel. Note: The computer that connects to the printer with a USB cable will have to be powered on in order for any machine to print to that printer.
This post is part of the series: Home Networking Made Easy
Most computer users have heard the term “Home Network” but aren’t quite sure what it is, or they are under the false impression that it is a complex technology that they will never be able to grasp, let alone implement. This guide simplifies the technology and makes it possible for anyone to use.